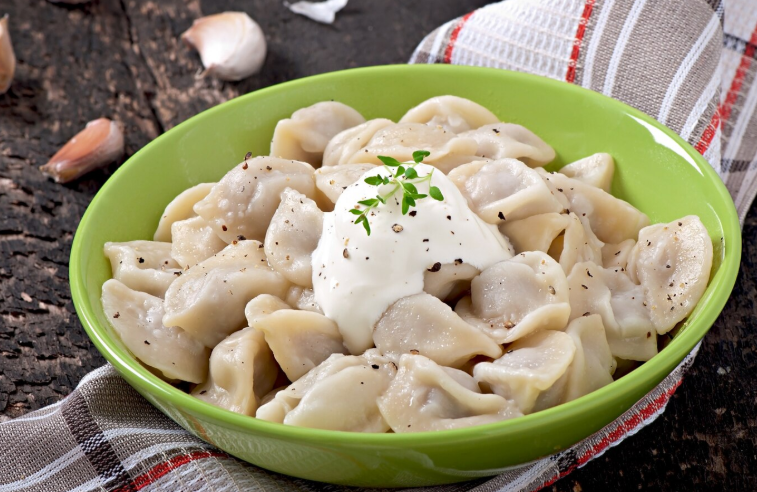
Steam rises from your grandmother’s kitchen pot, carrying memories that span decades. Ukrainian Varenyky represent more than simple potato dumplings – they embody generations of family traditions wrapped in tender, hand-rolled dough. Each bite transports you back to childhood Sunday dinners, where love was measured in spoonfuls and every meal told a story.
These pillowy treasures have graced Ukrainian tables for centuries, serving as both sustenance and celebration. Whether you’re reconnecting with your heritage or discovering comfort food that speaks directly to your heart, mastering Ukrainian Varenyky will transform your kitchen into a haven of warmth and tradition.
Table of Contents
What Makes Ukrainian Varenyky Special?
Ukrainian Varenyky distinguish themselves from similar Eastern European dumplings through their distinctive preparation methods and cultural significance. Unlike their Polish cousins (pierogi), authentic Ukrainian Varenyky feature thinner dough that creates a more delicate texture when cooked.
Your ancestors crafted these dumplings using simple ingredients that were readily available – flour, eggs, potatoes, and onions. This simplicity allowed families to create satisfying meals even during challenging times, making Varenyky a symbol of resourcefulness and resilience.
Regional variations across Ukraine showcase different techniques and flavor profiles. Western Ukrainian cooks often incorporate sour cream into their dough, while eastern regions prefer water-based preparations. These subtle differences reflect the diverse culinary landscape of this remarkable country.
Essential Ingredients for Authentic Ukrainian Varenyky
Creating perfect Ukrainian Varenyky requires quality ingredients and attention to detail. Your success depends on selecting the right components for both dough and filling.
Varenyky Dough Components
| Ingredient | Quantity | Purpose |
|---|---|---|
| All-purpose flour | 3 cups | Structure foundation |
| Warm water | ¾ cup | Binding agent |
| Large eggs | 2 | Elasticity enhancer |
| Salt | 1 teaspoon | Flavor development |
| Vegetable oil | 2 tablespoons | Tenderness creator |
Traditional Potato Filling
| Ingredient | Quantity | Role |
|---|---|---|
| Russet potatoes | 2 pounds | Primary filling |
| Yellow onions | 2 large | Flavor foundation |
| Butter | 4 tablespoons | Richness provider |
| Salt | To taste | Seasoning base |
| Black pepper | ½ teaspoon | Spice element |
| Sour cream | 2 tablespoons | Creaminess factor |
Step-by-Step Ukrainian Varenyky Preparation
Creating Your Dough Foundation
Begin your Ukrainian Varenyky journey by combining flour and salt in a spacious mixing bowl. Create a well in the center – this traditional technique ensures even ingredient distribution throughout your dough.
Whisk together eggs, warm water, and oil in a separate container. Pour this mixture into your flour well, then gradually incorporate the dry ingredients using a fork. Continue mixing until a shaggy dough forms.
Transfer your mixture onto a clean work surface and knead for 8-10 minutes. Proper kneading develops gluten structure, creating the smooth, elastic texture that makes Ukrainian Varenyky so special. Your finished dough should feel soft and slightly tacky without sticking to your hands.
Wrap your completed dough in plastic wrap and rest for 30 minutes. This resting period allows gluten to relax, making rolling much easier.
Preparing Perfect Potato Filling
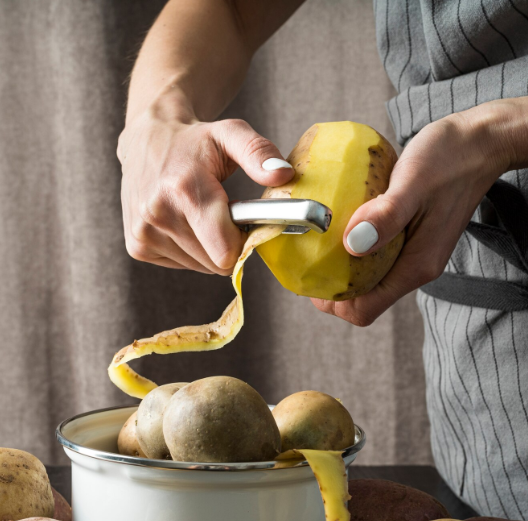
While your dough rests, focus on creating exceptional filling. Peel and cube your potatoes, then boil in salted water until fork-tender – approximately 15-20 minutes.
Simultaneously, dice your onions and sauté them in butter over medium heat. Cook until golden brown and fragrant, roughly 8-10 minutes. This caramelization process develops deep, rich flavors that elevate your Ukrainian Varenyky.
Drain your cooked potatoes thoroughly and mash until completely smooth. Lumpy filling creates uneven textures that detract from the final product. Fold in your sautéed onions, sour cream, salt, and pepper. Taste and adjust seasoning as needed – your filling should be flavorful enough to stand alone.
Allow your filling to cool completely before assembly. Hot filling makes dough handling difficult and can cause tearing.
Assembly and Shaping Techniques
Divide your rested dough into four equal portions. Working with one section at a time, roll into a thin sheet approximately ⅛-inch thick. Keep unused portions covered to prevent drying.
Cut circles using a 3-inch round cutter or glass. Place one tablespoon of cooled filling in each circle’s center. Avoid overfilling – excess filling causes bursting during cooking.
Fold each circle in half, creating a half-moon shape. Press edges firmly to seal, ensuring no air pockets remain. Traditional Ukrainian cooks crimp edges using a fork or their fingers, creating decorative patterns while securing the seal.
Cooking Your Ukrainian Varenyky
Traditional Boiling Method
Bring a large pot of salted water to a rolling boil. Add your Ukrainian Varenyky in small batches – overcrowding causes sticking and uneven cooking.
Cook for 3-4 minutes after they float to the surface. Floating indicates the dough is cooked through. Remove using a slotted spoon and drain briefly.
Enhancing with Pan-Frying
For extra flavor dimension, pan-fry your boiled Ukrainian Varenyky in butter until golden brown on both sides. This additional step creates a delightful textural contrast between crispy exterior and tender interior.
Serving Suggestions and Accompaniments
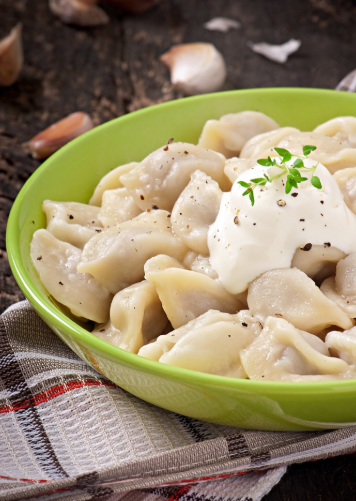
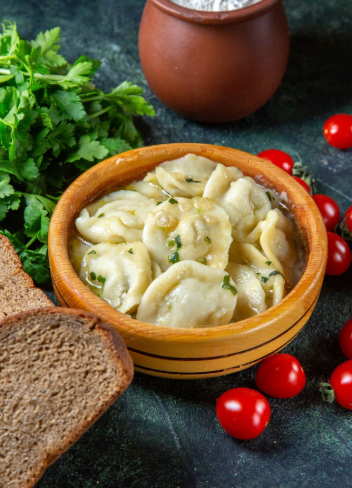
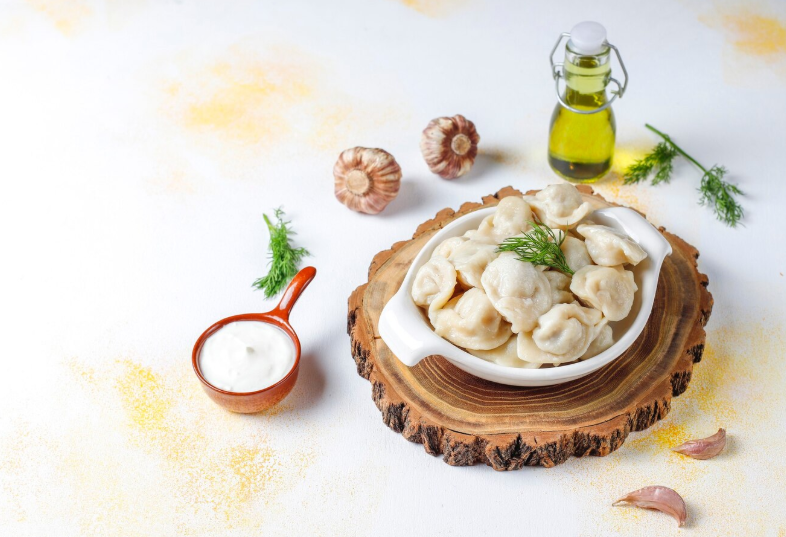
Traditional Ukrainian Varenyky shine when paired with simple, quality accompaniments:
- Sautéed onions in butter (essential classic topping)
- Fresh sour cream for tangy richness
- Chopped fresh dill for herbal brightness
- Crispy fried mushrooms for earthy depth
Modern interpretations might include caramelized onions with balsamic reduction or herb-infused olive oil drizzles.
Storage and Make-Ahead Tips
Your Ukrainian Varenyky freeze exceptionally well for future enjoyment. Arrange uncooked dumplings on parchment-lined baking sheets, ensuring they don’t touch. Freeze until solid, then transfer to freezer bags.
Frozen Ukrainian Varenyky cook directly from frozen – simply add 2-3 extra minutes to your cooking time. This convenience makes them perfect for busy weeknight dinners or unexpected guests.
Refrigerated cooked Varenyky keep for 3-4 days. Reheat by pan-frying in butter until heated through and slightly crispy.
Nutritional Benefits
Homemade Ukrainian Varenyky provide balanced nutrition when prepared with quality ingredients. Each serving delivers complex carbohydrates for sustained energy, plus protein from eggs and potassium from potatoes.
Controlling your ingredients allows you to avoid preservatives and excess sodium found in commercial alternatives. Your homemade version tastes superior while supporting your health goals.
Troubleshooting Common Issues
Tough dough? Reduce kneading time and ensure proper hydration.
Dumplings bursting during cooking? Check your sealing technique and avoid overfilling.
Bland filling? Season generously and taste before assembly.
Conclusion
Ukrainian Varenyky represent culinary heritage at its finest – simple ingredients transformed through traditional techniques into something truly special. Your kitchen becomes a bridge between past and present when you prepare these beloved dumplings.
Each batch you create honors generations of Ukrainian cooks who perfected these recipes through love and necessity. More than food, Ukrainian Varenyky embody community, comfort, and connection.
Ready to start your Ukrainian Varenyky adventure? Gather your ingredients today and begin creating memories that will last for generations. Share your results with family and friends – after all, the best recipes are those shared with love.
Tags: Ukrainian Varenyky, Ukrainian Varenyky with Potato