🌟 Why Does This Bread Rise So Much?
The secret often lies in a few key areas, mainly the hydration level, the quality of the yeast, and—most crucially—the kneading and proofing techniques.
💧 Hydration is Key
A higher-hydration dough (meaning more water relative to the flour) generally allows for a more open, fluffier crumb. It can be stickier to work with, but the final texture is worth the effort. This recipe leans slightly towards the wetter side, which encourages the formation of large air pockets.
💪 The Power of Proper Kneading
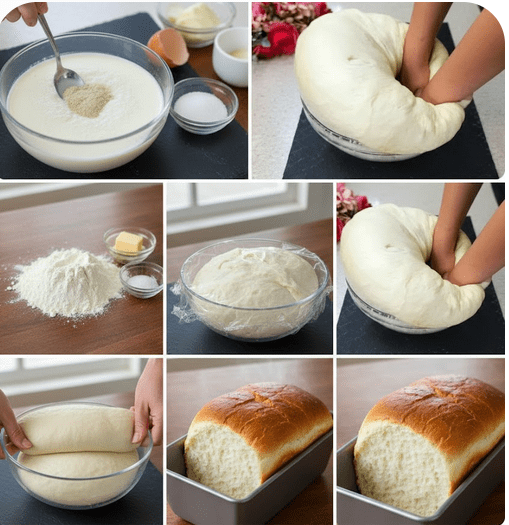
Kneading is not just about mixing; it’s about developing the gluten structure. Gluten, formed by the proteins in flour when mixed with water and worked, is the elastic network that traps the carbon dioxide gas produced by the yeast. A well-developed gluten network is strong enough to support the gas without collapsing, allowing the dough to rise high. The image above shows the dough being vigorously kneaded, a crucial step for achieving that ultimate elasticity.
👩🍳 The Recipe: How to Make This Fluffy Bread
Ready to bake? This recipe focuses on simple ingredients but emphasizes technique for that outstanding result.
📝 Ingredients You’ll Need
- All-purpose flour or bread flour
- Warm milk (about 105–115°F or 40–46°C)
- Active dry yeast or instant yeast
- Granulated sugar
- Salt
- Unsalted butter, softened
- Egg
🥣 Step 1: Activating the Yeast (If using Active Dry)
In a small bowl, combine the warm milk, a pinch of sugar, and the yeast. Give it a gentle stir. Let it sit for 5–10 minutes until it looks foamy. This tells you your yeast is alive and ready to work its magic! If using instant yeast, you can mix it directly with the dry ingredients.
🎛️ Step 2: Mixing and Kneading the Dough
- In a large mixing bowl, whisk together the flour, the remaining sugar, and the salt.
- Add the yeast mixture, the softened butter, and the egg to the dry ingredients.
- Mix until a shaggy dough forms.
- Turn the dough out onto a lightly floured surface. Knead vigorously for about 10–15 minutes until the dough is smooth, elastic, and passes the windowpane test (you can stretch a small piece thin enough to see light through it without it tearing). The photo illustrates this satisfying kneading process.
📈 Step 3: The First Rise (Bulk Fermentation)
Place the dough in a lightly oiled bowl, turning it once to coat. Cover the bowl with plastic wrap or a clean kitchen towel. Let it rise in a warm, draft-free spot until it has doubled in size—this usually takes 1 to 1.5 hours, depending on your room temperature. This is the bulk fermentation where the yeast is most active, creating that wonderful gas that gives the bread its lift.
shap Step 4: Shaping and the Second Rise
- Gently punch down the risen dough to release the gas.
- Divide the dough and shape it into your desired loaf shape (a tight cylinder for a sandwich loaf works best). This step is key to a beautiful crumb structure.
- Place the shaped dough into a greased loaf pan.
- Cover it loosely and let it proof for the second time (the second rise). This usually takes 30–45 minutes. The dough should look visibly puffed up, but not quite doubled.
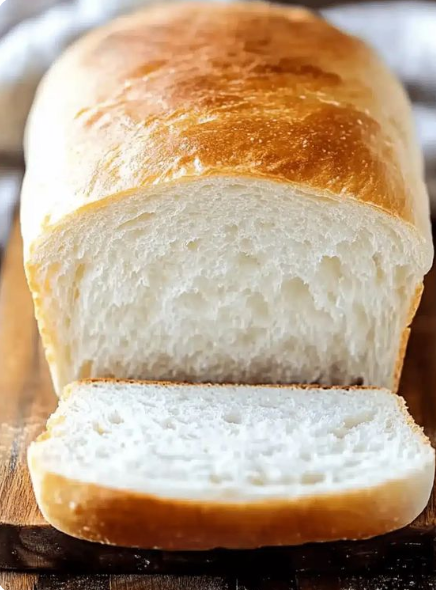
🔥 Step 5: Baking for Ultimate Fluffiness
Preheat your oven to the required temperature (typically around $375^\circ\text{F}$ or $190^\circ\text{C}$). Bake for 25–35 minutes, or until the crust is a deep golden brown and the internal temperature reaches $200^\circ\text{F}$ ($93^\circ\text{C}$). The resulting crumb, as shown in the second image, is bright white, incredibly soft, and testament to a successful rise.
💡 Troubleshooting and Tips for a Perfect Loaf
- My dough won’t rise: Your yeast might be old, or your milk might have been too hot and killed it. Ensure your liquid temperature is within the safe range.
- The loaf collapsed after baking: This often means the dough was over-proofed during the second rise. The gluten structure couldn’t hold the gas anymore. Watch the clock and the dough, but trust the feel more than the time.
- For a Softer Crust: Brush the loaf with milk or melted butter immediately after it comes out of the oven.
- For a Glossy Crust: Apply an egg wash (one egg whisked with a tablespoon of water) right before baking.
Learning to make this high-rising, very fluffy bread has been a game-changer for my kitchen. There is truly nothing better than pulling a warm, homemade loaf from the oven and tearing into that perfectly soft center. Give this method a try, and prepare to impress yourself with your baking prowess! Happy baking! 🥳
Would you like a suggestion for a delicious homemade jam to pair with this bread?
