
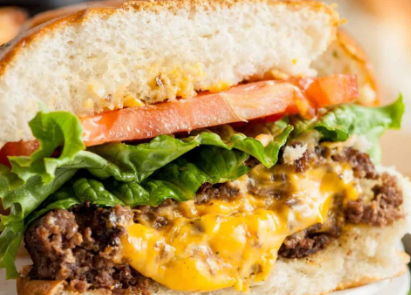
Picture this: you bite into what looks like an ordinary burger, only to be surprised by a molten river of cheese flowing from within. That magical moment is exactly what the Juicy Lucy delivers, and it’s been captivating taste buds since the 1950s.
The Origins Of The Jucy Lucy (yes, some spell it without the “i”) trace back to Minneapolis, Minnesota, where two iconic establishments – Matt’s Bar and the 5-8 Club – both claim to be the birthplace of this ingenious creation. What started as a simple idea to stuff cheese inside a burger patty instead of on top has become a legendary culinary phenomenon that defines Minneapolis dining culture.
This isn’t just any burger – it’s a testament to American ingenuity and the kind of comfort food that brings families together around the dinner table. Whether you’re a burger enthusiast, a comfort food lover, or someone who appreciates culinary history, mastering the art of the Juicy Lucy is a must-try adventure that will transform your home cooking game.
The beauty of this dish lies in its deceptive simplicity. With just a few quality ingredients and the right technique, you can recreate this Minneapolis masterpiece in your own kitchen, bringing a piece of Midwestern comfort food tradition to your family table.
Table of Contents
The Fascinating Origins Of The Juicy Lucy
A Tale of Two Diners
The story behind the Origins Of The Juicy Lucy is as rich and satisfying as the burger itself. In the heart of Minneapolis, two neighborhood joints have been locked in a friendly rivalry for decades, each claiming to be the true originator of this cheese-stuffed marvel.
Matt’s Bar, established in 1954, tells the story of a regular customer who asked for two patties with cheese in the middle instead of on top. The kitchen obliged, and the “Jucy Lucy” (they deliberately drop the “i”) was born. Meanwhile, the 5-8 Club, which has been serving the community since the 1920s, claims their version came first, calling it the “Juicy Lucy” with traditional spelling.
Cultural Impact and Legacy
What makes the Origins Of The Juicy Lucy so special isn’t just the technique – it’s the cultural significance. This burger represents the spirit of Minneapolis: unpretentious, innovative, and deeply satisfying. It’s been featured on countless food shows, attracted food pilgrims from across the nation, and inspired countless variations in restaurants worldwide.
The original concept was brilliantly simple: seal cheese between two thin patties, creating a molten surprise that elevates the entire burger experience. This technique prevents the cheese from sliding off and creates an interactive eating experience that’s both exciting and delicious.
Ingredients List
For the Burger Patties:
- 1½ pounds ground beef chuck (80/20 blend for best flavor and juiciness)
- 1 teaspoon kosher salt
- ½ teaspoon freshly ground black pepper
- ½ teaspoon garlic powder
- ¼ teaspoon onion powder
For the Cheese Filling:
- 4 slices American cheese (traditional choice)
- Alternative: 4 slices sharp cheddar or Swiss cheese
- Alternative: 4 oz cream cheese mixed with 2 oz shredded cheese for extra creaminess
For Assembly:
- 4 hamburger buns (brioche or sesame seed work beautifully)
- 2 tablespoons butter for toasting buns
- 4 lettuce leaves (optional)
- 4 tomato slices (optional)
- 4 thin onion slices (optional)
- Pickles for serving
- Your favorite condiments (ketchup, mustard, mayo)
Ingredient Substitutions:
- For leaner option: Use 90/10 ground beef, but add 1 tablespoon olive oil to maintain juiciness
- For different flavors: Try pepper jack cheese for heat, or gouda for smokiness
- Gluten-free option: Use gluten-free burger buns
- Dairy-free alternative: Use dairy-free cheese slices
Step-by-Step Instructions for Perfect Origins Of The Juicy Lucy
Step 1: Prepare Your Workspace
Start by setting up your workspace with all ingredients within reach. Remove the ground beef from the refrigerator 15-20 minutes before cooking to bring it closer to room temperature. This ensures even cooking throughout your patties.
Step 2: Season and Divide the Meat
In a large bowl, gently combine the ground beef with salt, pepper, garlic powder, and onion powder. Don’t overmix – you want to maintain the meat’s texture. Divide the seasoned beef into 8 equal portions, roughly 3 ounces each.
Step 3: Form the Bottom Patties
Take 4 portions and gently shape them into patties that are slightly larger than your burger buns. Make these patties thin – about ¼ inch thick. Create a small well in the center of each patty to hold the cheese securely.
Step 4: Add the Cheese
Place one slice of cheese in the center of each bottom patty, folding it slightly if needed to keep it away from the edges. This is crucial for preventing cheese leakage during cooking. Leave about a ½-inch border around the cheese.
Step 5: Create the Top Patties and Seal
Form the remaining 4 portions into slightly larger, thinner patties. Place these over the cheese-topped bottom patties. Now comes the critical step: carefully pinch and seal the edges all around, creating a complete seal. Take your time here – any gaps will result in cheese leakage.
Step 6: Let Them Rest
Place your sealed patties on a plate and let them rest for 10 minutes. This helps the meat settle and makes the patties easier to handle during cooking.
Step 7: Preheat Your Cooking Surface
Heat a cast-iron skillet, grill pan, or outdoor grill to medium-high heat. You want a hot surface that will create a beautiful sear while cooking the patties through evenly.
Step 8: Cook the First Side
Place your patties on the hot surface and cook for 4-5 minutes without moving them. You’ll hear the sizzle – that’s the sound of a perfect sear developing. Resist the urge to press down on the patties, as this can cause the cheese to leak out.
Step 9: Flip Carefully and Finish Cooking
Using a sturdy spatula, carefully flip each patty. Cook for another 4-5 minutes. The internal temperature should reach 160°F for food safety, and you’ll notice the patties will puff slightly as the cheese inside melts.
Step 10: Toast the Buns and Assemble
While the patties finish cooking, butter the cut sides of your buns and toast them in a separate pan until golden brown. This adds texture and prevents the buns from becoming soggy.
Pro Tips & Variations for Origins Of The Juicy Lucy Recipes
Essential Cooking Tips
Temperature Control: Medium heat is your friend. Too high, and the outside burns before the inside cooks; too low, and you won’t get that coveted crispy exterior.
The Seal Test: Before cooking, gently squeeze the sealed edges. If you feel any soft spots, re-seal them. A proper seal is the difference between success and a cheesy mess.
Resting Period: Always let your cooked patties rest for 2-3 minutes before serving. This allows the molten cheese to cool slightly and redistribute, preventing dangerous cheese burns.
Delicious Variations
Spicy Jalapeño Lucy: Mix finely diced jalapeños into cream cheese for a spicy kick that complements the beef beautifully.
Bacon Lover’s Lucy: Add crispy bacon bits to your cheese filling for an extra layer of smoky flavor.
Mushroom Swiss Lucy: Use Swiss cheese and add sautéed mushrooms to the mix for an earthy, sophisticated twist.
BBQ Ranch Lucy: Incorporate a small amount of BBQ sauce and ranch powder into the cheese for a tangy surprise.
Healthier Options
Turkey Lucy: Substitute ground turkey (85/15 blend) for beef. Add an extra tablespoon of olive oil and season generously to maintain flavor.
Veggie-Packed Version: Mix finely minced vegetables like bell peppers or onions into the meat for added nutrition and flavor complexity.
Storage & Reheating Tips
Proper Storage Methods
Store cooked Juicy Lucy patties in the refrigerator for up to 3 days in airtight containers. For best results, store the patties separately from the buns to maintain texture quality.
For longer storage, wrap individual cooked patties in plastic wrap and freeze for up to 2 months. Label with the date and cooking instructions for easy reference.
Reheating for Best Results
Oven Method (Recommended): Preheat oven to 350°F. Place patties on a baking sheet and cover with foil. Heat for 10-12 minutes until warmed through. This method maintains the patty’s texture while gently reheating the cheese center.
Skillet Method: Heat a lightly oiled skillet over medium-low heat. Cook patties for 2-3 minutes per side, covering with a lid to ensure even heating.
Microwave (Quick Option): Place patty on a microwave-safe plate, cover with a damp paper towel, and heat in 30-second intervals until warm. Be cautious as the cheese center will be extremely hot.
Frequently Asked Questions About Origins Of The Juicy Lucy
Can I Make Juicy Lucy Patties Ahead of Time?
Absolutely! You can prepare the sealed patties up to 24 hours in advance. Store them in the refrigerator on a plate covered with plastic wrap. This actually helps the flavors meld and makes the patties easier to handle when cooking. Just remember to bring them closer to room temperature before cooking for even heat distribution.
What’s the Best Cheese for Authentic Origins Of The Juicy Lucy Recipes?
Traditional Minneapolis establishments use American cheese for its superior melting properties and mild flavor that doesn’t overpower the beef. However, sharp cheddar, Swiss, or even pepper jack can create delicious variations. The key is choosing a cheese that melts well and won’t become stringy or separate when heated.
How Do I Prevent the Cheese from Leaking Out?
The secret lies in proper sealing technique and temperature control. Make sure your bottom patty has a slight well for the cheese, keep the cheese away from the edges, and thoroughly pinch and seal the perimeter. Cook on medium heat rather than high to allow even cooking without bursting the seal.
Can I Freeze Uncooked Juicy Lucy Patties?
Yes! Place the sealed, uncooked patties on a baking sheet lined with parchment paper and freeze for 2 hours. Then transfer to freezer bags for up to 3 months. Cook from frozen, adding 2-3 extra minutes to each side. This is perfect for meal prep and having homemade Juicy Lucys ready anytime.
Is It Safe to Eat if the Cheese Leaks During Cooking?
If some cheese leaks out, your burger is still perfectly safe to eat, though you’ll miss some of the molten surprise factor. The leaked cheese often creates delicious crispy bits around the patty that many people actually prefer. Just ensure your ground beef reaches an internal temperature of 160°F for food safety.
Nutritional Information (Per Serving)
Calories: Approximately 520 Protein: 35g
Fat: 28g
Carbohydrates: 32g (including bun)
Fiber: 2g
Sodium: 890mg
Calcium: 180mg (from cheese)
Note: Nutritional values are approximate and may vary based on specific ingredients and portion sizes used.
Origins Of The Juicy Lucy Recipe Card
Classic Minneapolis-Style Juicy Lucy
Prep Time: 20 minutes
Cook Time: 10 minutes
Total Time: 30 minutes
Servings: 4 burgers
Ingredients:
- 1½ pounds ground beef chuck (80/20)
- 1 teaspoon kosher salt
- ½ teaspoon black pepper
- ½ teaspoon garlic powder
- ¼ teaspoon onion powder
- 4 slices American cheese
- 4 hamburger buns
- 2 tablespoons butter
- Optional toppings: lettuce, tomato, onion, pickles
Instructions:
- Season ground beef with salt, pepper, garlic powder, and onion powder
- Divide into 8 equal portions and form 4 thin bottom patties with wells
- Place cheese in wells, leaving ½-inch border
- Top with remaining 4 portions formed into patties
- Seal edges thoroughly and let rest 10 minutes
- Cook on medium-high heat for 4-5 minutes per side
- Toast buttered buns until golden
- Let patties rest 2-3 minutes before serving
- Assemble with desired toppings and serve immediately
Notes:
- Critical Safety Tip: Let cooked patties rest before eating – the cheese center will be extremely hot!
- For best results, use a meat thermometer to ensure internal temperature reaches 160°F
- The key to success is proper sealing – take time to ensure no gaps around the edges
Final Thoughts on the Origins Of The Jucy Lucy
The Origins Of The Juicy Lucy represent more than just a burger innovation – they embody the spirit of American comfort food at its finest. This Minneapolis creation has transcended its humble diner origins to become a beloved culinary icon that continues to surprise and delight food lovers across the nation.
What makes this burger truly special is its ability to transform a simple meal into an experience. The anticipation as you take that first bite, the surprise of the molten cheese center, and the satisfaction of a perfectly executed comfort food classic – it’s pure culinary magic that you can now recreate in your own kitchen.
Whether you’re honoring the traditional American cheese version or experimenting with your own creative variations, remember that the heart of the Juicy Lucy lies in its simplicity and the joy it brings to those who experience it. Each bite connects you to decades of Minneapolis tradition and the countless families who have shared this special burger around their dinner tables.
The next time you’re looking to elevate your burger game or surprise your family with something truly special, remember the story of the Origins Of The Juicy Lucy. It’s proof that sometimes the best innovations come from the simplest ideas, executed with care and shared with love.
If you enjoyed learning about the Origins Of The Juicy Lucy and trying these recipes, please share this post with friends and family who love great comfort food! We’d love to hear about your Juicy Lucy adventures and any creative variations you discover. Drop us a comment below and let us know how your homemade Minneapolis masterpiece turned out – your cooking stories and tips inspire us all!
Tags: Origins Of The Juicy Lucy