The traditional defrosting process typically takes anywhere from three to six hours, depending on how much ice has accumulated. During that time, you’re stuck dealing with melting ice, soggy towels, and the constant worry about your food thawing. There has to be a better way—and thanks to my grandmother’s wisdom, there is.
The Science Behind Why This Method Works So Well
Before diving into the actual technique, understanding why this hack works helps you appreciate its brilliance. Ice melts faster when exposed to heat, obviously, but the key is applying that heat efficiently and safely to speed up the process without damaging your appliance.
My nana’s method uses something you already have in your kitchen to create a concentrated heat source that accelerates melting without requiring you to stand there working. The approach takes advantage of basic physics: warm air rises and spreads, creating an environment where ice cannot maintain its frozen state.
The beauty of this technique is that it works with the freezer’s design rather than against it. Most modern freezers are built to withstand temperature fluctuations, and this method stays within safe parameters while dramatically reducing defrosting time.
What You’ll Need for This Quick Defrosting Method
The supplies for this hack are incredibly simple, which is part of what makes it so practical. You probably have everything already sitting in your kitchen:
- Several large pots or heat-safe bowls
- Boiling water
- Towels (old ones work perfectly)
- A baking sheet or large tray
- Oven mitts or pot holders
That’s it. No special equipment, no expensive tools, and certainly no hours of manual labor. The simplicity is what makes this method accessible to everyone, regardless of physical ability or available time.
Step-by-Step: How to Defrost Your Freezer in Five Minutes
Preparing Your Freezer
Start by unplugging your freezer or turning it off. This safety step prevents the appliance from trying to maintain cold temperatures while you’re introducing heat, which would work against your efforts and potentially strain the compressor.
Remove all food items from the freezer. Place them in coolers with ice packs if available, or if you’re working quickly in cool weather, they can sit in a cool garage or outside temporarily. The five-minute timeframe means your food won’t have time to thaw significantly.
Take out any removable shelves, drawers, or ice trays. These items will only get in the way and might get damaged during the process. Set them aside where they won’t be forgotten.
Place several towels on the floor directly in front of and underneath the freezer. You’ll have water runoff, and protecting your floor from water damage is essential. If your freezer has a drain plug, position a shallow pan underneath to catch the water.
The Actual Defrosting Technique
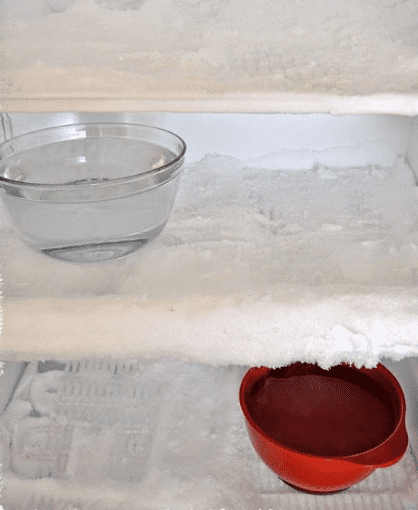
Here’s where my nana’s wisdom truly shines. Boil water in your kettle or on the stove—you’ll need enough to fill your large pots or bowls about three-quarters full. While the water heats, place your baking sheet or large tray on one of the freezer shelves if they’re still in, or directly on the bottom of the freezer.
Once the water reaches a rolling boil, carefully pour it into your pots or heat-safe bowls. Using oven mitts, place these containers of boiling water inside the freezer, positioning them on the baking sheet or tray you’ve prepared. The tray protects the freezer bottom from direct heat exposure.
Close the freezer door and walk away. Yes, really—that’s the entire technique. The steam from the boiling water fills the enclosed space, creating a sauna-like environment that causes the ice to release from the walls and begin melting immediately.
