My grandmother’s century-old bread recipe has been the cornerstone of our family for generations, and today I’m sharing it with you. There’s something magical about bread made from a recipe that has survived wars, migrations, and countless family gatherings. This isn’t just another bread recipe—it’s a time-tested treasure that produces loaves so perfect, you’ll genuinely stop buying store-bought bread.
I still remember watching my grandmother’s weathered hands work the dough, her movements practiced and confident from decades of repetition. She never measured anything precisely, yet her bread turned out perfect every single time. It took me years to translate her instinctive knowledge into measurements others could follow, but I finally cracked the code.
Table of Contents
Why This Old-Fashioned Recipe Stands Above the Rest
Modern bread recipes often prioritize speed over quality, using instant yeast and shortcuts that sacrifice flavor and texture. My grandmother’s method takes longer, but the results justify every minute. The slow fermentation develops complex flavors that commercial bread simply cannot match.
This recipe requires only five basic ingredients—flour, water, salt, yeast, and a touch of sweetness. No preservatives, no dough conditioners, no unpronounceable chemicals. Just pure, wholesome ingredients that your great-great-grandparents would recognize.
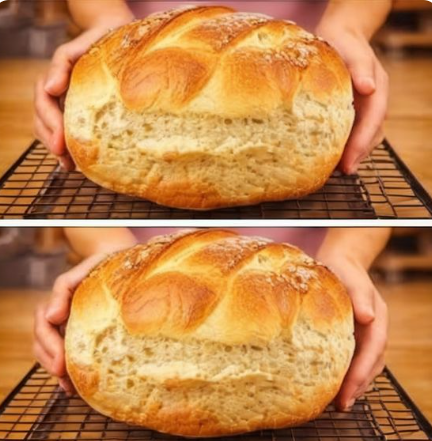
The bread stays fresh for days without refrigeration, develops a golden-brown crust that crackles when you slice it, and fills your home with an aroma that no candle can replicate. Once you master this recipe, the plastic-wrapped supermarket loaves will seem like a pale imitation of real bread.
The Secret Techniques That Make All the Difference
The Sponge Method: Building Flavor Through Patience
Unlike modern recipes that mix everything at once, my grandmother started with a sponge—a pre-fermentation that gives the yeast time to develop flavor compounds. This step separates good bread from extraordinary bread.
You combine a portion of the flour, all the water, and the yeast, then let this mixture rest for several hours or overnight. During this time, the yeast begins breaking down the flour’s starches, creating acids and alcohols that give artisan bread its characteristic tangy depth.
This technique also makes the final dough easier to work with. The gluten has already begun developing during the sponge stage, so you’ll knead less while achieving better texture.
The Windowpane Test: Knowing When Your Dough Is Ready
My grandmother never talked about gluten development, but she knew exactly when the dough was ready. She would stretch a small piece between her fingers, and if it formed a thin, translucent membrane without tearing, it was perfect.
This windowpane test remains the most reliable way to check if you’ve kneaded enough. Under-kneaded dough produces dense, heavy bread. Over-kneaded dough becomes tough and loses its airy structure. The windowpane tells you when you’ve hit that sweet spot.
Creating Steam: The Professional Baker’s Secret at Home
That crackling, caramelized crust on bakery bread comes from steam in the oven’s first minutes of baking. My grandmother achieved this by placing a cast-iron pan on the oven’s bottom rack and adding boiling water right after putting the bread in.
The steam keeps the bread’s surface moist during the initial rise, allowing it to expand fully before the crust sets. Then, as the steam dissipates, the crust dries and caramelizes into that beautiful golden-brown finish.
The Complete Recipe: Step-by-Step Instructions
Ingredients You’ll Need
For two large loaves:
- 6 cups all-purpose flour (plus extra for kneading)
- 2½ cups lukewarm water
- 2 tablespoons active dry yeast
- 2 tablespoons sugar or honey
- 1 tablespoon salt
- 2 tablespoons butter or olive oil (softened)
