Introduction: The Cheesecake of Your Dreams Awaits
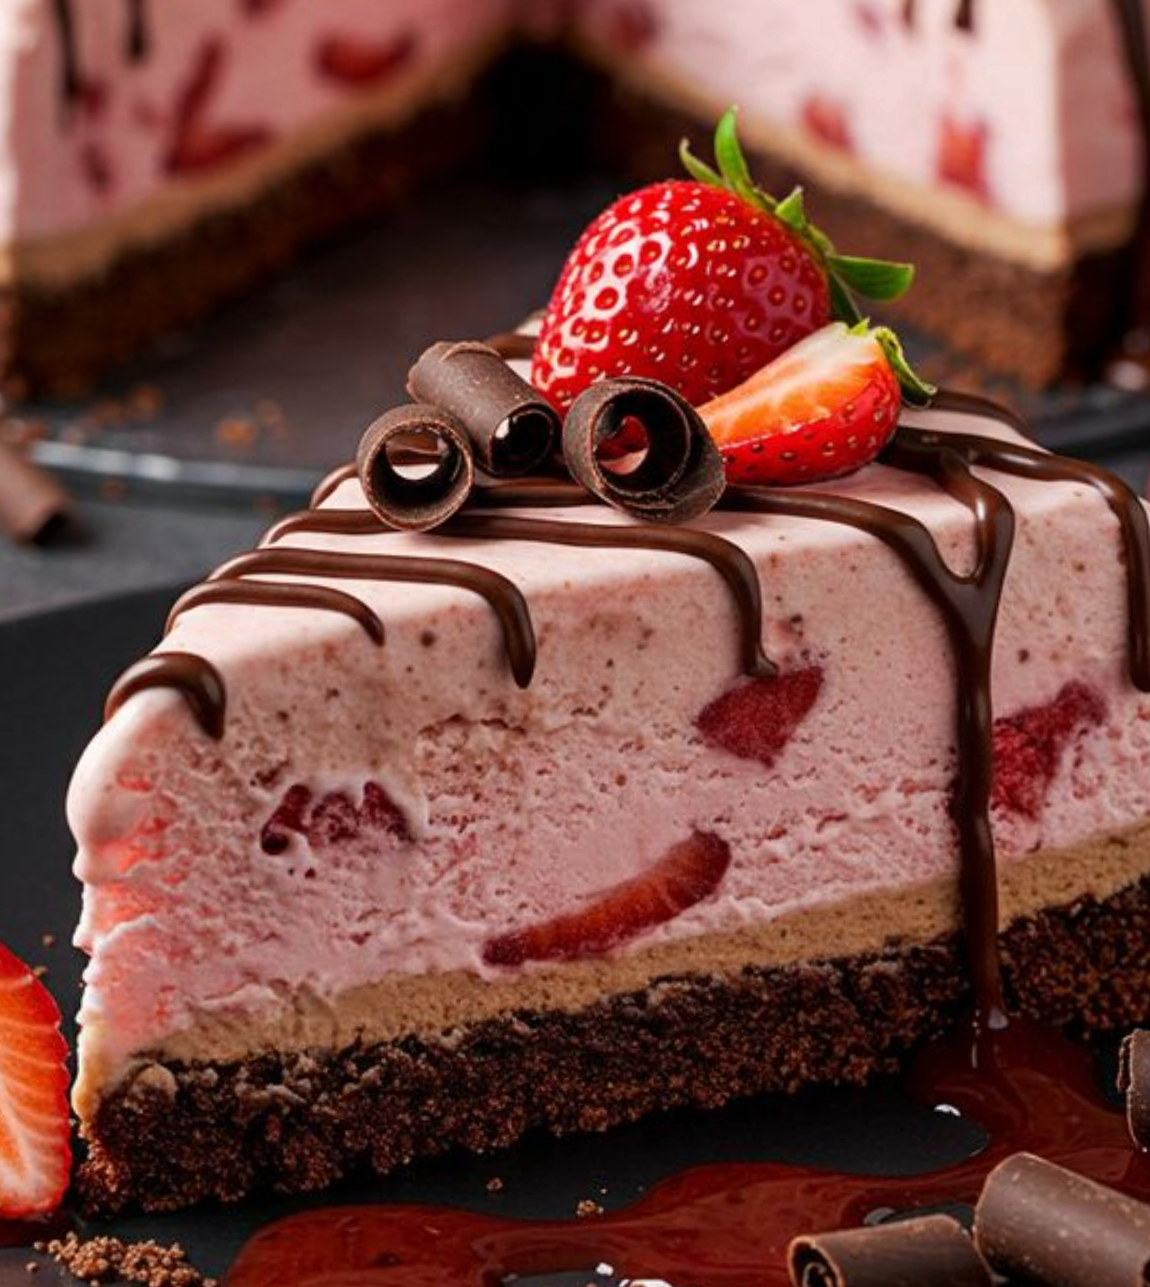
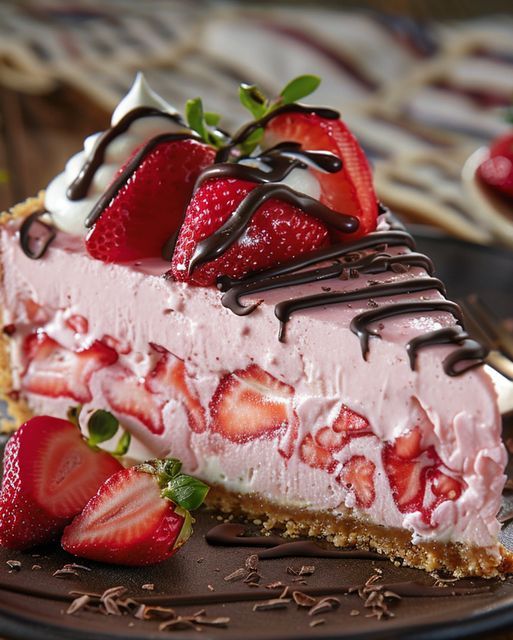
There’s something absolutely magical about that first bite of a perfectly crafted cheesecake. The way the creamy filling melts on your tongue, the delicate balance between sweetness and tang, and those fresh strawberries on top that add a burst of natural flavor—it’s pure bliss. If you’re craving an elegant dessert that looks restaurant-worthy but tastes even better than what you’d find at a fancy bakery, then this Luscious Strawberry Dream Cheesecake is calling your name.
I’ve been obsessed with perfecting this recipe for years, and I’m thrilled to finally share it with you. This isn’t just any cheesecake; it’s a celebration of creamy decadence paired with the bright, refreshing taste of fresh strawberries. Whether you’re planning a special dinner party, celebrating an important milestone, or simply want to treat yourself to something extraordinary, this dream cheesecake is the answer.
Table of Contents
Why This Recipe?
The beauty of this Strawberry Dream Cheesecake lies in its versatility and accessibility. You don’t need professional baking skills or hard-to-find ingredients to create something that tastes like it came from a five-star patisserie. This recipe is perfect for home bakers who want impressive results, anyone following halal dietary guidelines, and dessert lovers who appreciate the finer things in life. Plus, it’s completely free from alcohol, wine, and pork products, making it suitable for diverse dietary preferences and requirements.
The Story Behind the Dream Cheesecake
Cheesecake has been a beloved dessert for centuries, with roots tracing back to ancient Greece. However, the creamy American-style cheesecake we know and love today became popular in the 1870s when cream cheese was invented in New York. Over time, bakers have experimented with countless variations, and the strawberry cheesecake emerged as an absolute classic—a timeless combination that never goes out of style.
This particular Luscious Strawberry Dream Cheesecake takes that classic concept and elevates it with a slightly silkier texture, a perfectly balanced flavor profile, and a presentation that’ll have your guests asking for the recipe immediately. The “dream” element comes from the incredibly smooth, creamy filling that practically melts in your mouth, combined with the tartness of fresh strawberries that cuts through the richness beautifully.
Ingredients for Your Luscious Strawberry Dream Cheesecake
For the Crust:
- 2 cups graham cracker crumbs (about 16 full crackers)
- ½ cup unsalted butter, melted
- 3 tablespoons granulated sugar
- ¼ teaspoon sea salt
For the Cheesecake Filling:
- 32 oz (four 8-oz packages) cream cheese, room temperature
- 1 cup granulated sugar
- ½ cup cornstarch
- 4 large eggs, room temperature
- ¾ cup full-fat sour cream, room temperature
- ¼ cup heavy cream
- 2 tablespoons vanilla extract
- 1 tablespoon fresh lemon juice
- ¼ teaspoon sea salt
For the Strawberry Topping:
- 1½ pounds fresh strawberries, washed and hulled
- 4 tablespoons granulated sugar
- 2 tablespoons cornstarch
- 2 tablespoons water
- 1 tablespoon fresh lemon juice
- Pinch of sea salt
Optional Garnish:
- Dark chocolate shavings (halal-certified)
- Fresh mint leaves
- Whipped cream
Ingredient Substitutions & Notes:
- Graham crackers can be replaced with digestive biscuits or vanilla wafers for a different flavor profile
- If you prefer a lower-fat version, Greek yogurt can substitute 25% of the cream cheese (though the texture will be slightly different)
- Strawberries can be swapped for raspberries, blueberries, or a mixed berry combination
- Use grade-A pure vanilla extract for the best flavor
Step-by-Step Instructions: Creating Your Dream Cheesecake
Preparing Your Cheesecake Pan
Step 1: Prepare the Pan Start by preheating your oven to 325°F (165°C). Take a 9-inch springform pan and wrap the outside tightly with aluminum foil—this prevents water from seeping into your cheesecake during the water bath process. Lightly grease the inside of the pan with butter or cooking spray.
Creating the Perfect Crust
Step 2: Make the Graham Cracker Crust In a medium bowl, combine your graham cracker crumbs, melted butter, sugar, and sea salt. Mix until the texture resembles wet sand—every crumb should be moistened with butter. This is crucial for a crust that holds together beautifully.
Step 3: Press and Chill the Crust Press this mixture firmly into the bottom of your prepared springform pan, using the bottom of a measuring cup to create an even layer. You want a crust that’s about ¼-inch thick. Place the pan in the freezer while you prepare the filling—this gives the crust time to set and prevents it from absorbing moisture.
Creating the Silky Filling
Step 4: Combine Cream Cheese and Sugar This is where patience pays off. Using an electric mixer on medium-low speed, beat your room-temperature cream cheese for about 2 minutes until it’s completely smooth and creamy. It shouldn’t have any lumps—this is non-negotiable for a silky texture. Gradually add your sugar, mixing for another 2-3 minutes.
Pro Tip: Room-temperature cream cheese is absolutely essential. Cold cream cheese incorporates air bubbles that can create cracks in your finished cheesecake. Remove it from the fridge 30 minutes before baking.
Step 5: Add the Cornstarch Sift the cornstarch over the cream cheese mixture and blend on low speed until just combined. The cornstarch acts as a binding agent and helps prevent cracking during baking—it’s a secret weapon many home bakers don’t know about!
Step 6: Incorporate Eggs Carefully Add your eggs one at a time, mixing on low speed after each addition. This is crucial—overmixing at this stage can incorporate too much air, leading to cracks. Mix just until each egg is incorporated, then move to the next one.
Step 7: Add Final Wet Ingredients Reduce your mixer to the lowest speed and add the sour cream, heavy cream, vanilla extract, lemon juice, and sea salt. Mix just until these ingredients are folded into the batter. Don’t overdo it—you want a smooth, cohesive mixture without excess air.
Step 8: Let It Rest Let your filling rest for 5 minutes. This allows any air bubbles to rise to the surface, which you can gently skim away with a spoon.
Baking with a Water Bath
Step 9: Set Up the Water Bath Pour your filling into the crust-lined springform pan. Place the springform pan inside a larger roasting pan. Pour hot water into the roasting pan until it reaches halfway up the sides of the springform pan. The water bath ensures gentle, even heat distribution and prevents cracking.
Step 10: Bake Low and Slow Bake your Luscious Strawberry Dream Cheesecake at 325°F for 50-60 minutes. The cheesecake is done when the outer 2 inches of the filling are set, but the center (about a 4-inch circle in the middle) still jiggles slightly when you gently shake the pan. It should look barely set, not fully firm.
Important: Don’t overbake! A slightly underbaked cheesecake will set perfectly as it cools and will have a creamier texture.
Step 11: Cool Gradually Turn off your oven and crack the door open about 2 inches. Leave the cheesecake in the oven for 1 hour. This gradual cooling prevents thermal shock, which is a major cause of cheesecake cracks. After 1 hour, remove the cheesecake from the oven and let it cool at room temperature for another hour.
Step 12: Chill Completely Transfer your cheesecake to the refrigerator and chill for at least 6 hours, though overnight is truly best. This allows the flavors to meld and the texture to become perfectly set.
Preparing the Strawberry Topping
Step 13: Prepare Your Strawberries While your cheesecake is cooling, prepare the strawberry topping. Hull your fresh strawberries and slice them in half lengthwise. In a small saucepan, combine sugar, cornstarch, water, lemon juice, and sea salt.
Step 14: Create the Strawberry Glaze Heat the mixture over medium heat, stirring constantly. Once it comes to a gentle simmer, add your sliced strawberries. Continue cooking for 2-3 minutes until the strawberries have released their juices and the mixture becomes glossy and thick. The cornstarch will create a beautiful glaze that coats the strawberries perfectly.
Step 15: Cool the Topping Remove from heat and let the strawberry mixture cool to room temperature. This prevents the topping from causing the cheesecake to crack or developing a warm spot on the surface.
Final Assembly
Step 16: Top Your Masterpiece Once both the cheesecake and strawberry topping are completely cooled, spoon the strawberry mixture evenly over the top of your cheesecake. Add chocolate shavings or fresh mint if desired for an extra touch of elegance.
Step 17: Remove from Pan and Serve To remove your cheesecake from the springform pan, run a hot, thin-bladed knife around the edges to loosen it from the sides. Unspring the pan carefully. For clean slices, dip your knife in hot water and wipe it clean between cuts.
Pro Tips & Variations: Make It Your Own
Baking Success Tips
- Use a cake thermometer: The center of your cheesecake should register 150°F when done for perfect results
- Don’t skip the water bath: It’s the difference between a creamy cheesecake and one with a dense, rubbery texture
- Invest in a quality springform pan: A reliable pan prevents leaks during the water bath process
- Make it ahead: Cheesecake actually tastes better 24 hours after baking as flavors meld together
Delicious Variations
White Chocolate Strawberry Dream: Add 4 oz melted white chocolate to the filling for a richer, slightly sweeter version
Strawberry Cheesecake Swirl: Before baking, drizzle a strawberry puree over the filling and swirl it gently with a knife for a marbled effect
No-Bake Version: Make a lightened no-bake version by folding whipped cream into the cream cheese mixture and chilling for 4 hours instead of baking (though the texture will be less dense and creamy)
Mini Cheesecake Cups: Divide the batter among lined muffin tins and bake for 18-22 minutes for individual servings that are perfect for entertaining
Healthier Alternative: Replace half the cream cheese with Greek yogurt and use honey instead of sugar for a slightly tangy, less sweet version
Storage & Reheating Tips: Keep Your Cheesecake Fresh
How to Store Your Cheesecake
Store your Strawberry Dream Cheesecake in an airtight container in the refrigerator for up to 5 days. The strawberry topping will release more liquid over time, so if you’re planning to keep it longer than 2 days, store the topping separately and add it fresh before serving.
Freezing for Later
This cheesecake freezes beautifully! Wrap individual slices tightly in plastic wrap and then place them in a freezer-safe container. It will keep frozen for up to 3 months. Thaw slices in the refrigerator for 4-6 hours before serving. The texture will remain creamy and delicious.
Reheating (If Needed)
Cheesecake is best served chilled straight from the refrigerator. However, if you prefer it at room temperature, remove slices 20-30 minutes before serving. Never reheat cheesecake in the oven, as it will dry out and may develop cracks.
Frequently Asked Questions About Strawberry Dream Cheesecake
Can I Make This Cheesecake Without a Water Bath?
While a water bath is highly recommended for the best results, you can bake without one if necessary. Simply reduce the oven temperature to 300°F and bake for 70-80 minutes, checking frequently for doneness. However, the texture may not be quite as creamy, and there’s a higher risk of cracking.
Can I Prepare This Cheesecake Ahead of Time?
Absolutely! In fact, this cheesecake benefits from being made a day ahead. You can make it up to 3 days in advance and store it covered in the refrigerator. Add the strawberry topping no more than 2-3 hours before serving to prevent the topping from becoming too soft.
What If My Cheesecake Cracks?
Don’t panic! Cracks happen to the best bakers. While you can’t eliminate them once they’ve formed, you can hide them completely with the strawberry topping. In the future, avoid overbaking, use room-temperature ingredients, and cool gradually to prevent cracking.
Can I Use Frozen Strawberries Instead of Fresh?
Fresh strawberries are ideal because they provide a better texture and appearance. However, if you must use frozen, thaw them completely and drain any excess liquid before cooking them down for the topping. The final result will be slightly softer but still delicious.
How Many Servings Does This Make?
This Luscious Strawberry Dream Cheesecake typically yields 12-16 slices depending on how large you cut them. For elegant dinner parties, aim for 12 generous slices; for smaller dessert portions, cut 16 slices.
Is This Recipe Truly Halal-Friendly?
Yes! This recipe contains no pork products, alcohol, or wine. All ingredients are naturally compliant with halal dietary requirements. Always verify that your specific ingredient brands (especially vanilla extract and chocolate) are halal-certified if this is important for your needs.
Nutritional Information (Per Serving, Based on 12 Slices)
- Calories: 485 kcal
- Protein: 8g
- Fat: 32g
- Carbohydrates: 42g
- Fiber: 1g
- Sugar: 36g
- Sodium: 280mg
Note: Nutritional values are approximate and may vary based on specific ingredient brands and portion sizes.
Recipe Card: Luscious Strawberry Dream Cheesecake
LUSCIOUS STRAWBERRY DREAM CHEESECAKE
Prep Time: 25 minutes
Cook Time: 60 minutes
Chill Time: 6+ hours
Total Time: 6 hours 45 minutes
Servings: 12-16 slices
INGREDIENTS
For the Crust:
- 2 cups graham cracker crumbs
- ½ cup unsalted butter, melted
- 3 tablespoons granulated sugar
- ¼ teaspoon sea salt
For the Cheesecake Filling:
- 32 oz cream cheese, room temperature
- 1 cup granulated sugar
- ½ cup cornstarch
- 4 large eggs, room temperature
- ¾ cup full-fat sour cream, room temperature
- ¼ cup heavy cream
- 2 tablespoons vanilla extract
- 1 tablespoon fresh lemon juice
- ¼ teaspoon sea salt
For the Strawberry Topping:
- 1½ pounds fresh strawberries, washed and hulled
- 4 tablespoons granulated sugar
- 2 tablespoons cornstarch
- 2 tablespoons water
- 1 tablespoon fresh lemon juice
- Pinch of sea salt
For Garnish:
- Dark chocolate shavings
- Fresh mint leaves
- Whipped cream (optional)
INSTRUCTIONS
- Preheat your oven to 325°F (165°C). Wrap the outside of a 9-inch springform pan with aluminum foil and lightly grease the interior.
- Combine graham cracker crumbs, melted butter, sugar, and sea salt in a medium bowl. Mix until it resembles wet sand.
- Press the mixture firmly into the bottom of your prepared pan using the bottom of a measuring cup. Place in the freezer while preparing the filling.
- Beat room-temperature cream cheese on medium-low speed for 2 minutes until smooth and creamy.
- Gradually add sugar and mix for 2-3 minutes. Sift cornstarch over the mixture and blend on low speed until combined.
- Add eggs one at a time on low speed, mixing just until combined after each addition.
- Add sour cream, heavy cream, vanilla extract, lemon juice, and sea salt on the lowest speed until just combined.
- Let the filling rest for 5 minutes, then spoon into the prepared crust.
- Place the springform pan in a larger roasting pan. Pour hot water into the roasting pan until it reaches halfway up the sides of the springform pan.
- Bake at 325°F for 50-60 minutes until the outer edges are set but the center still jiggles slightly when gently shaken.
- Turn off the oven, crack the door open 2 inches, and leave the cheesecake in the oven for 1 hour.
- Remove from the oven and let cool at room temperature for 1 hour, then transfer to the refrigerator to chill for at least 6 hours (overnight is best).
- While the cheesecake cools, prepare the strawberry topping by slicing fresh strawberries. Combine sugar, cornstarch, water, lemon juice, and sea salt in a small saucepan.
- Heat the mixture over medium heat, stirring constantly, until it comes to a gentle simmer. Add the sliced strawberries and cook for 2-3 minutes until glossy.
- Remove from heat and let the topping cool to room temperature.
- Once the cheesecake and topping are completely cooled, spoon the strawberry mixture evenly over the top of the cheesecake.
- Run a hot knife around the edges to loosen from the pan, then carefully remove the springform.
- Slice with a hot, wet knife (wiping clean between cuts) and serve immediately. Garnish with chocolate shavings and fresh mint if desired.
NOTES
- Don’t skip the water bath—it’s essential for a creamy texture
- Room-temperature ingredients are crucial for best results
- This cheesecake actually tastes better the day after baking
- Store covered in the refrigerator for up to 5 days
- Freezes well for up to 3 months when wrapped individually
- If making ahead, add the strawberry topping within 2-3 hours of serving
Final Thoughts: Your Turn to Create Magic
Creating a Luscious Strawberry Dream Cheesecake is more than just following a recipe—it’s an exercise in patience, precision, and pure love for good food. Yes, there are multiple steps, but each one serves a purpose in creating that silky, decadent texture that makes this dessert so special.
The beautiful thing about this recipe is that it’s approachable for home bakers while still impressive enough for special occasions. Whether you’re celebrating an anniversary, hosting a dinner party, or simply want to treat yourself to something extraordinary, this cheesecake delivers.
I’d absolutely love to hear how your Strawberry Dream Cheesecake turns out! Please share your baking stories in the comments below—did you try any variations? Did you add your own special touch? Your experiences and tips help our community of food lovers learn and grow together.
If you enjoyed this recipe, please share it with your friends and family who are fellow dessert enthusiasts. Pin it for later, bookmark it, or save it to your favorite recipe collection. And don’t forget to tag us on social media if you make it—we love seeing your culinary creations!
Happy baking, and may your kitchen soon be filled with the aroma of the most luscious cheesecake you’ve ever made! 🍓🍫
This recipe has been tested and refined to ensure the best possible results for home bakers at all skill levels. All ingredients are halal-friendly with no alcohol, wine, or pork products.
