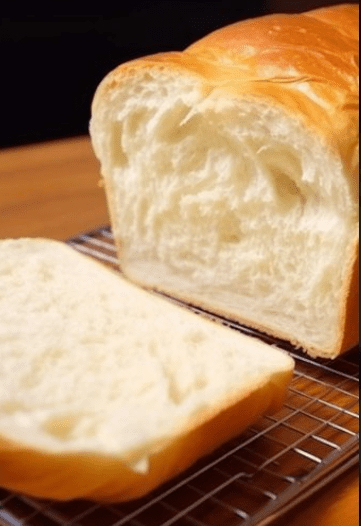
There’s something incredibly satisfying about baking your own bread — the aroma filling your kitchen, the golden crust crackling as it cools, and the soft, airy crumb that melts in your mouth. Recently, I learned how to make this bread, and I can confidently say it’s one of the fluffiest loaves I’ve ever baked. It rises beautifully and stays soft for days, making it perfect for sandwiches, breakfast toasts, or simply enjoying with butter and honey.
Table of Contents
The Secret Behind This Perfectly Fluffy Bread
When I first started baking bread, my results were inconsistent. Sometimes it was dense, sometimes dry. But after learning this technique, everything changed. The secret lies in three key steps: proper kneading, a warm rise, and a touch of milk and butter for softness.
This bread uses simple ingredients but relies on patience and precision to achieve that bakery-quality rise and texture. Let’s go through the details.
Ingredients You’ll Need
You probably already have most of these in your kitchen:
- 3 cups all-purpose flour (or bread flour for extra chewiness)
- 2 ¼ teaspoons active dry yeast (one packet)
- 1 tablespoon sugar
- 1 teaspoon salt
- ¾ cup warm milk (not hot, around 38–40°C)
- ¼ cup warm water
- 2 tablespoons melted butter (unsalted)
- 1 egg (optional, for a richer flavor and color)
Tip: The temperature of the liquid is crucial — too hot and it kills the yeast; too cold and it won’t activate properly.
Step-by-Step: How I Learned to Make This Bread
Step 1: Activate the Yeast
In a small bowl, mix warm water, sugar, and yeast. Let it sit for about 10 minutes until it becomes foamy. This means your yeast is alive and ready to work its magic.
Step 2: Prepare the Dough
In a large mixing bowl, combine the flour and salt. Add the activated yeast mixture, warm milk, melted butter, and the egg if you’re using it. Stir until the dough comes together.
Step 3: Knead Until Smooth
Transfer the dough onto a lightly floured surface. Knead for about 8–10 minutes, until it’s smooth and elastic. The dough should spring back when pressed with your finger.
Step 4: Let It Rise
Place the dough in a greased bowl, cover it with a clean towel, and let it rise in a warm place for about 1 hour — or until doubled in size. This step gives your bread that light, fluffy texture.
Step 5: Shape and Second Rise
Punch down the dough to release air bubbles. Shape it into a loaf or divide it into rolls, depending on your preference. Place it in a greased pan and let it rise again for another 30–40 minutes.
Step 6: Bake to Perfection
Preheat your oven to 180°C (350°F). Bake for 25–30 minutes, or until the top is golden brown. The bread should sound hollow when tapped underneath.
Once baked, brush the top with a little melted butter for a soft, shiny crust.
The Science Behind the Rise
Bread rising is all about yeast fermentation. When yeast feeds on sugar, it releases carbon dioxide, which gets trapped in the gluten network formed by the flour. That’s why kneading is so important — it strengthens gluten strands, allowing the dough to trap air and rise higher.
Adding milk and butter enriches the dough, making it softer and giving it a tender crumb. These ingredients also help the bread stay fresh longer.
Serving Ideas for Fluffy Homemade Bread
This bread is incredibly versatile. Here are a few ways I love to enjoy it:
- Breakfast: Toasted with butter and a drizzle of honey.
- Lunch: As a base for sandwiches — turkey, cheese, or grilled vegetables.
- Dinner: Served warm with soup or stew.
- Snack: Spread with peanut butter or homemade jam for a quick treat.
You can even use this same recipe to make dinner rolls or burger buns by shaping smaller portions and baking for a shorter time.
Troubleshooting Common Bread Issues
Even the best bakers face challenges sometimes. Here are some tips I’ve learned:
- Bread didn’t rise enough? Check if your yeast is fresh and that your liquid wasn’t too hot.
- Dense texture? You may have under-kneaded or skipped the second rise.
- Dry loaf? Try adding a bit more butter or milk next time.
Remember: bread baking is both a science and an art. A little practice makes a big difference.
Final Thoughts
I learned how to make this bread with patience and a few simple tweaks — and now it’s a staple in my kitchen. Every time I bake it, the loaf rises beautifully, filling the air with that comforting, homemade aroma.
If you’ve ever wanted to bake your own soft, fluffy bread that rises a lot and tastes incredible, this recipe is the perfect place to start. It’s simple, rewarding, and will make you fall in love with baking all over again.
Try it once, and you’ll never want store-bought bread again.
