
The Step-by-Step Dough & Frying Process
Creating the dough takes patience, but the payoff is a batch of donuts that are tender and irresistibly delicious. Remember, the quality of the final donut is directly related to the rising time.
1. Activate the Yeast: In a large bowl, combine the warm milk, a pinch of sugar, and the yeast. Let it sit for 5-10 minutes until foamy. This confirms your yeast is alive and ready to work!
2. Mix the Dough: Add the remaining sugar, egg, melted butter, and vanilla extract to the yeast mixture. Whisk gently. In a separate bowl, whisk together the flour and salt. Gradually add the dry mixture to the wet mixture.
3. Knead and Rise: Mix until a shaggy dough forms, then turn it out onto a lightly floured surface. Knead for 5-7 minutes until the dough is smooth and elastic. Place the dough in a lightly oiled bowl, turning to coat. Cover and let rise in a warm place for 1 to 1.5 hours, or until doubled in size.
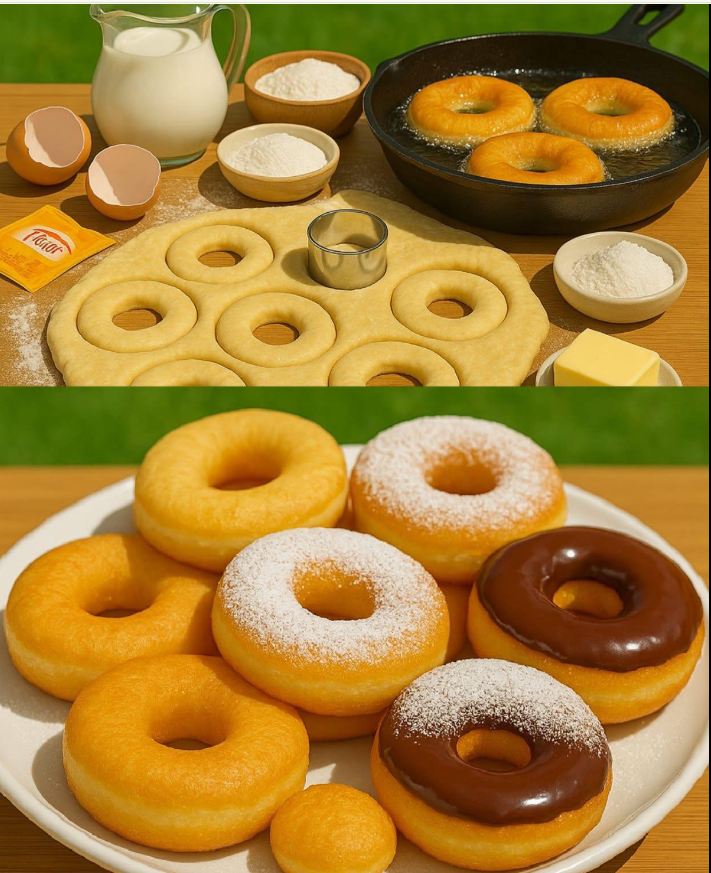
4. Shape the Donuts: Gently punch down the risen dough and roll it out to about 1/2-inch thickness. Use a donut cutter (or two different-sized round cutters) to cut out the rings and the donut holes. Place the cut donuts on parchment-lined baking sheets. Cover lightly and let rise for a second, shorter time (about 30 minutes).
5. Fry to Golden Perfection: Heat about 2-3 inches of oil in a large pot or Dutch oven to 375°F. Carefully drop 2-3 donuts into the hot oil (do not overcrowd). Fry for 60-90 seconds per side, until golden brown. Use a spider strainer to remove them and place them on a cooling rack lined with paper towels.
Finishing Touches and Practical Insights ✨
Did you know that the small “donut holes” are often the best part? Frying these takes less time, about 30-45 seconds per side.
Once cooled, you can finish your donuts simply with a dusting of powdered sugar, a cinnamon-sugar mix, or a homemade chocolate glaze. For an easy glaze, whisk together powdered sugar, a splash of milk, and a tiny bit of vanilla extract until smooth. Dip the warm donuts immediately. These homemade treats are best enjoyed the same day they are made—a true testament to their freshness!
Making your own donuts not only guarantees the freshest, fluffiest texture but also allows you to control the ingredients and customize the flavors. It transforms a simple dessert into a comforting, high-quality baking experience.
So, are you planning on a classic glazed, or will you experiment with a new flavor for your very first batch? Let me know!
