
The beauty of crepes lies in their simplicity. You’ll need just six basic ingredients:
All-purpose flour creates the structure. One cup is all you need for approximately eight to ten crepes, making this recipe perfect for feeding a small family or hosting brunch guests.
Eggs provide richness and help bind everything together. Two large eggs create the ideal texture that’s neither too dense nor too delicate.
Milk is the main liquid component. You’ll need about one and a quarter cups to achieve that signature thin consistency. Whole milk produces the richest flavor, but any milk variety works beautifully.
Water thins the batter to the perfect pourable consistency. Just a quarter cup makes all the difference between thick pancakes and delicate crepes.
Melted butter adds flavor and prevents sticking. Three tablespoons incorporated into the batter ensure every crepe has that characteristic buttery taste.
Salt enhances all the other flavors. Just a pinch is enough to elevate the entire recipe without making the crepes taste salty.
Step-by-Step Crepe Making Process 👩🍳
Mixing the Batter
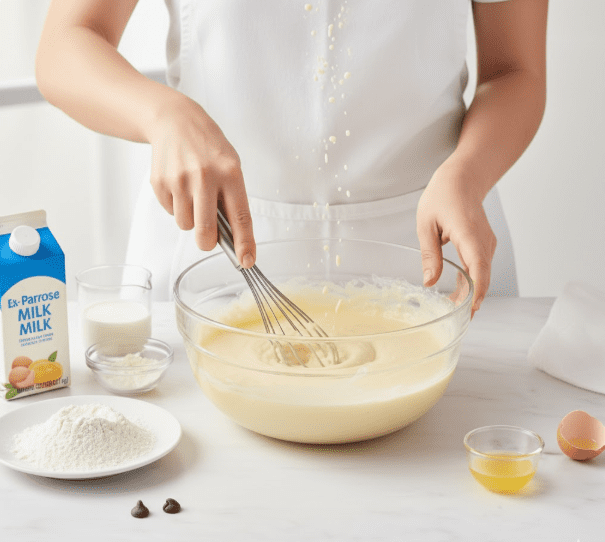
Start by whisking together the flour and eggs in a large bowl until smooth. Gradually add the milk and water, stirring constantly to prevent lumps from forming. Once the mixture is completely smooth, stir in the melted butter and salt. The batter should have a consistency similar to heavy cream, flowing easily when poured.
For the smoothest results, let your batter rest for at least 15 minutes at room temperature. This resting period allows the flour to fully hydrate and the gluten to relax, resulting in more tender crepes. If you have extra time, refrigerating the batter for up to two hours produces even better results.
Heating Your Pan
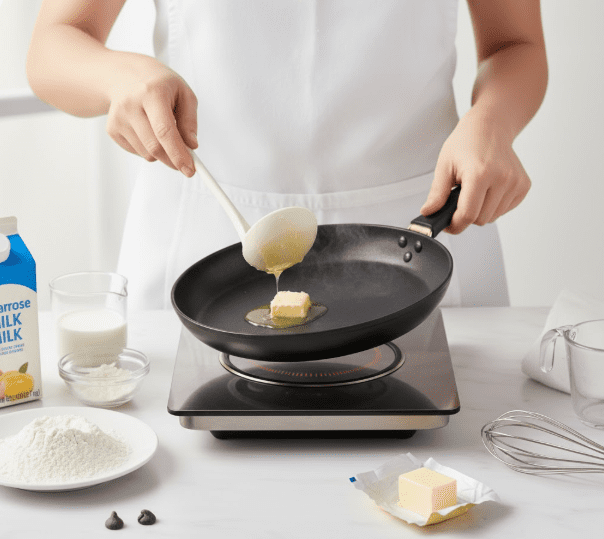
The right pan temperature is crucial for crepe success. Heat a nonstick skillet or crepe pan over medium heat. An eight-inch pan works perfectly for standard-sized crepes. Lightly butter the pan before cooking each crepe, using either a pastry brush or a paper towel to spread a thin, even layer.
Cooking the Crepes
Pour approximately one-quarter cup of batter into the center of your hot pan. Immediately lift the pan off the heat and tilt it in a circular motion, swirling the batter to coat the bottom in a thin, even layer. This swirling motion is the secret to achieving those beautifully thin crepes.
Return the pan to the heat and cook for about one to two minutes, until the bottom turns light golden brown and the edges begin to curl slightly. Gently loosen the edges with a spatula, then flip the crepe using either the spatula or, if you’re feeling confident, a quick flick of the wrist. Cook the second side for another 30 seconds to one minute.
Troubleshooting Common Issues 🔧
If your first crepe tears or looks imperfect, don’t worry. The first one is always a test to get your pan temperature and batter consistency just right. Consider it the cook’s treat!
Batter that’s too thick won’t spread properly. Simply whisk in a tablespoon of milk or water at a time until you reach the right consistency. Conversely, if your batter is too thin and tears easily, whisk in a small amount of flour.
Crepes sticking to the pan usually means you need more butter or your pan isn’t hot enough. Make sure to butter the pan lightly between each crepe for the best results.
Serving Suggestions and Fillings 🍓
The possibilities for filling and topping crepes are endless. For a classic sweet option, try fresh strawberries with whipped cream and a dusting of powdered sugar. Nutella and sliced bananas create an irresistible combination that appeals to all ages.
Savory crepes shine with fillings like scrambled eggs, sautéed mushrooms, and cheese. Spinach and feta make a delicious vegetarian option, while chicken and creamy sauce transforms crepes into an elegant dinner entrée.
Storage and Make-Ahead Tips 📦
Crepes actually improve with storage, making them perfect for meal prep. Stack cooked crepes with parchment paper between each layer and store them in an airtight container in the refrigerator for up to three days. They also freeze beautifully for up to two months.
To reheat, simply warm them in a dry skillet over low heat for about 30 seconds per side, or microwave for 15 to 20 seconds. You can even prepare a large batch on the weekend and have quick, elegant breakfasts ready throughout the week.
Your Crepe Journey Begins
Easy homemade crepes prove that French cuisine isn’t as intimidating as it seems. With just basic pantry staples and a little practice, you can create these elegant, versatile treats anytime the mood strikes. The key is patience with your first few attempts and confidence in your swirling technique. Soon you’ll be flipping crepes like a pro and impressing everyone with your culinary skills. So grab your whisk and pan, and let the crepe-making adventure begin! 🌟
