Picture this: you’ve got unexpected guests arriving in an hour, and you need a show-stopping dessert that won’t keep you chained to the kitchen. Enter the magical world of cherry dump cake – a dessert so wonderfully simple that its name literally tells you the cooking method!
The beauty of this cherry dump cake recipe lies in its humble origins. Born from the practical wisdom of busy home cooks in the American Midwest during the 1970s, dump cakes earned their endearing name because you literally “dump” the ingredients into a pan and let the oven work its magic. No mixing bowls, no complicated techniques – just pure, unadulterated deliciousness.
This cherry dump cake is perfect for potluck dinners, family gatherings, or those moments when you’re craving something sweet but don’t want to spend hours baking. Whether you’re a complete beginner in the kitchen or a seasoned cook looking for a foolproof crowd-pleaser, this recipe will become your secret weapon for instant dessert success.
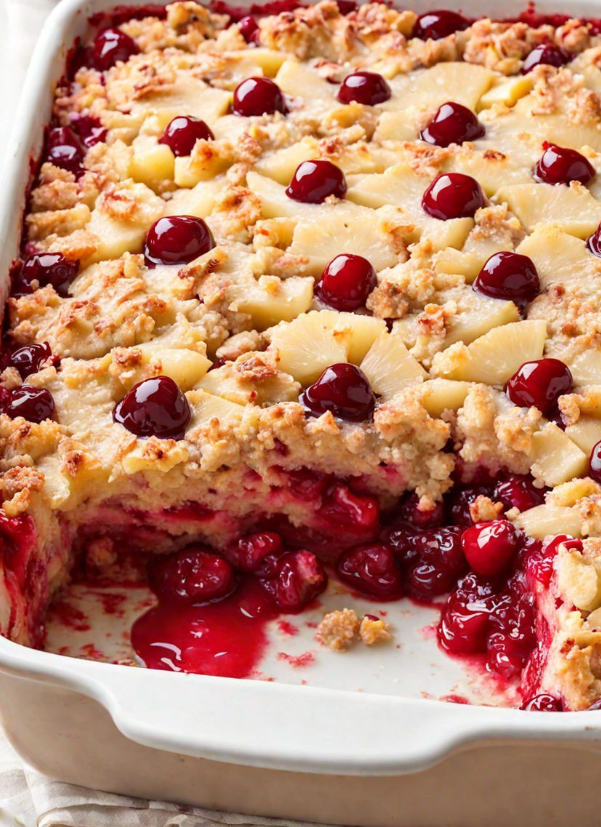
What makes this particular cherry dump cake recipe special is how the tart-sweet cherries create perfect pockets of flavor throughout the tender, golden cake. Each bite delivers a delightful contrast of textures – from the slightly crispy top to the moist, fruity bottom layer that’ll have everyone asking for your “secret.”
Table of Contents
Ingredients List
For this incredible cherry dump cake, you’ll need these simple ingredients:
Main Ingredients:
• 2 cans (21 oz each) cherry pie filling • 1 box (15.25 oz) yellow cake mix (ensure it’s halal-certified) • 1/2 cup (1 stick) unsalted butter • 1/2 cup chopped walnuts or pecans (optional) • 1/4 cup sliced almonds for topping (optional)
Substitution Options:
• Butter substitute: Use halal-certified margarine or coconut oil (solid, not melted) • Cake mix alternatives: Vanilla or white cake mix work beautifully • Nut-free version: Simply omit nuts and add extra cake mix for more coverage • Fresh cherry option: Use 4 cups pitted fresh cherries mixed with 3/4 cup sugar and 2 tablespoons cornstarch
Step-by-Step Instructions
1. Prepare Your Workspace
Preheat your oven to 375°F (190°C). Grease a 9×13 inch baking dish with butter or cooking spray. This prevents sticking and ensures easy serving later.
2. Create the Cherry Foundation
Open both cans of cherry pie filling and spread them evenly across the bottom of your prepared baking dish. Don’t worry about making it perfectly smooth – those little hills and valleys will create wonderful texture in your finished cherry dump cake.
3. Add the Cake Mix Layer
Sprinkle the dry cake mix evenly over the cherry filling. Here’s a pro tip: use a fine-mesh sieve to distribute the cake mix more evenly, which helps prevent lumpy spots in your final dessert.
4. Prepare the Butter
Cut your cold butter into thin slices – about 1/8 inch thick works perfectly. Distribute these butter pieces evenly across the top of the cake mix. The butter will melt during baking and help create that irresistible golden crust.
5. Add Optional Toppings
If you’re using nuts, sprinkle them over the butter pieces now. The chopped walnuts add wonderful crunch, while sliced almonds provide elegant visual appeal to your cherry dump cake.
6. Bake to Perfection
Place your dish in the preheated oven and bake for 35-40 minutes. You’ll know it’s ready when the top is golden brown and you can hear gentle bubbling around the edges. The aroma filling your kitchen will be absolutely divine!
7. Cool and Serve
Allow your cherry dump cake to cool for at least 15 minutes before serving. This cooling time helps the filling set properly and prevents burns from the hot cherry filling.
Pro Tips & Variations
Expert Cooking Tricks:
Temperature Control: Use an oven thermometer to ensure accuracy. Even a 25-degree difference can affect your cherry dump cake’s texture.
Butter Distribution: For extra richness, grate frozen butter directly over the cake mix using a cheese grater. This creates more even distribution and better texture.
Fruit Enhancement: Add 1 teaspoon vanilla extract or almond extract to your cherry filling before adding the cake mix for deeper flavor complexity.
Delicious Variations:
Tropical Cherry Dump Cake: Add 1/2 cup shredded coconut and replace half the cherries with pineapple chunks.
Spiced Version: Mix 1 teaspoon cinnamon and 1/4 teaspoon nutmeg into the cake mix before sprinkling.
Healthier Option: Use sugar-free cherry filling and substitute half the butter with unsweetened applesauce.
Double Berry Delight: Combine cherry filling with one can of blueberry or blackberry pie filling.
Storage & Reheating Tips
Proper Storage:
Store your leftover cherry dump cake covered in the refrigerator for up to 4 days. The flavors actually improve overnight as they meld together, making day-two servings even more delicious.
Reheating Instructions:
Oven Method: Reheat individual portions at 300°F for 8-10 minutes until warmed through. Microwave Method: Heat single servings for 30-45 seconds on medium power to avoid overheating the filling. Serving Tip: Let reheated portions cool for 2-3 minutes before eating, as the cherry filling retains heat longer than the cake portion.
Frequently Asked Questions About Cherry Dump Cake
Can I Make This Cherry Dump Cake Ahead of Time?
Absolutely! You can assemble your cherry dump cake up to 4 hours before baking. Just cover with foil and refrigerate, then add 5-10 extra minutes to the baking time since it’ll start cold.
Can I Freeze Cherry Dump Cake?
Yes! This dessert freezes beautifully for up to 3 months. Wrap cooled portions tightly in plastic wrap and aluminum foil. Thaw overnight in the refrigerator and reheat as directed above.
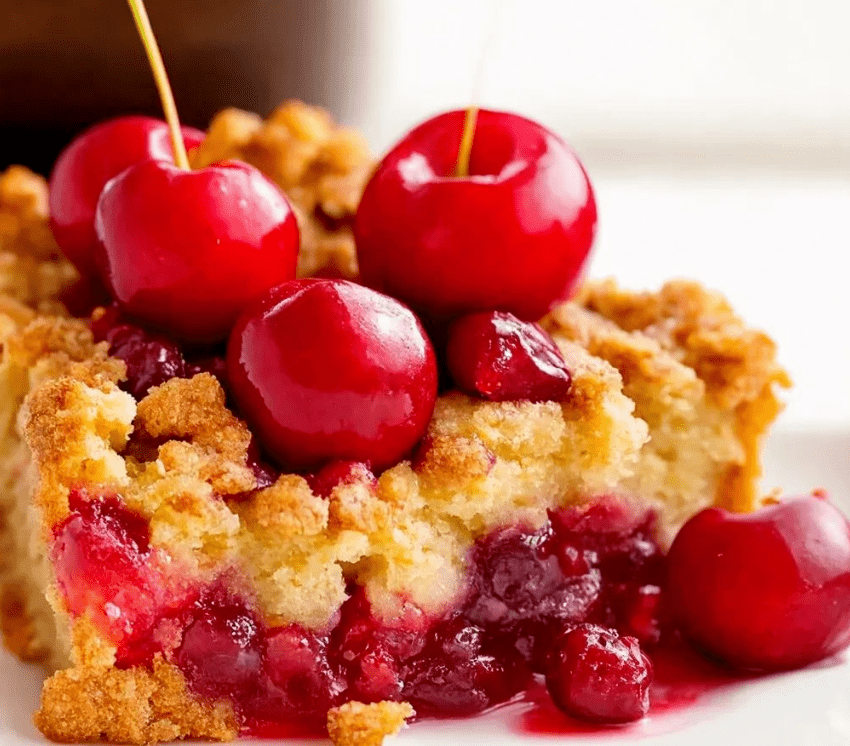
What’s the Best Way to Serve Cherry Dump Cake?
Serve warm with a scoop of vanilla ice cream or a dollop of whipped cream. The temperature contrast creates an amazing experience, and the creamy elements balance the fruit’s tartness perfectly.
Can I Use Fresh Cherries Instead of Canned?
Definitely! Use 4 cups of pitted fresh cherries mixed with 3/4 cup sugar, 2 tablespoons cornstarch, and 1 tablespoon lemon juice. Let this mixture sit for 15 minutes before using in your cherry dump cake recipe.
Why Is My Dump Cake Soggy on Top?
This usually happens when the butter isn’t distributed evenly or if there’s too much moisture in the fruit. Make sure to use cold, sliced butter and avoid overly juicy fruit. If needed, add an extra 1/2 cup of cake mix for better absorption.
Nutritional Information
Per serving (based on 12 servings):
- Calories: Approximately 285
- Carbohydrates: 52g
- Fat: 8g
- Protein: 3g
- Fiber: 2g
- Sugar: 38g
Note: Nutritional values are approximate and may vary based on specific brands and substitutions used.
Recipe Card
Cherry Dump Cake Recipe
Prep Time: 10 minutes
Cook Time: 35-40 minutes
Total Time: 50 minutes
Servings: 12
Ingredients:
• 2 cans (21 oz each) cherry pie filling • 1 box (15.25 oz) yellow cake mix • 1/2 cup unsalted butter • 1/2 cup chopped nuts (optional) • 1/4 cup sliced almonds (optional)
Instructions:
- Preheat oven to 375°F and grease 9×13 inch baking dish
- Spread cherry pie filling evenly in prepared dish
- Sprinkle cake mix evenly over cherries
- Distribute thin butter slices across cake mix
- Add nuts if using
- Bake 35-40 minutes until golden brown and bubbling
- Cool 15 minutes before serving
Notes:
- Ensure all ingredients are halal-certified
- Best served warm with ice cream or whipped cream
- Stores covered in refrigerator up to 4 days
- Can be frozen for up to 3 months
This cherry dump cake recipe proves that sometimes the simplest approaches yield the most spectacular results. The combination of sweet-tart cherries, tender cake, and golden buttery topping creates a dessert that’s both comforting and impressive.
If you enjoyed this recipe, please share it with friends and family, and let us know your thoughts in the comments — we love hearing your cooking stories and tips! Did you try any of our suggested variations? We’d love to know which version became your family’s favorite.
Tags: Cherry Dump Cake, Dump Cake