Why This Bruster’s Ice Cream Cake Will Become Your Family’s New Obsession
Picture this: it’s your daughter’s 8th birthday, and she’s been talking about wanting a “real ice cream cake” for weeks. You know the one – that magical creation with layers of creamy ice cream, rich chocolate crunch, and fluffy whipped topping that makes everyone’s eyes light up.
That’s exactly how I discovered the magic of making a Bruster’s ice cream cake at home. After countless trips to our local Bruster’s and watching my kids’ faces light up with every bite, I knew I had to crack the code of this beloved frozen dessert.
This ice cream cake isn’t just another dessert – it’s a showstopper that transforms ordinary moments into extraordinary memories. Whether you’re celebrating a birthday, graduation, or just want to surprise your family on a random Tuesday, this recipe delivers that authentic Bruster’s experience right from your own kitchen.
The best part? You control every ingredient, ensuring it’s completely halal-friendly while maintaining that irresistible taste that makes Bruster’s famous. Get ready to become the dessert hero of every gathering! 🎉
Table of Contents
Fresh Ingredients for Your Perfect Bruster’s Ice Cream Cake
For the Chocolate Crunch Layer:
- 2 cups chocolate wafer cookies (crushed into fine crumbs)
- 4 tablespoons unsalted butter (melted)
- 2 tablespoons powdered sugar
- 1 teaspoon vanilla extract
For the Ice Cream Layers:
- 1.5 quarts vanilla ice cream (softened)
- 1.5 quarts chocolate ice cream (softened)
- Optional substitution: Use any halal-certified ice cream flavors of your choice
For the Whipped Topping:
- 2 cups heavy whipping cream (cold)
- 1/3 cup powdered sugar
- 1 teaspoon vanilla extract
- Alternative: 2 containers (8 oz each) whipped topping, thawed
For Decoration:
- 1/4 cup chocolate chips or sprinkles
- Fresh berries (optional)
- Chocolate syrup for drizzling
✅ Halal Note: Always verify that your ice cream and chocolate products are certified halal. Most major brands offer halal options – just check the packaging!
Step-by-Step Instructions to Create Your Masterpiece
Preparing Your Workspace
- Line your pan: Use a 9×13 inch pan and line it with plastic wrap, leaving overhang for easy removal later.
- Soften your ice cream: Remove both ice cream containers from freezer 15-20 minutes before starting. You want them soft enough to spread but not melted.
Building the Foundation 🏗️
- Create the crunch layer: In a medium bowl, combine crushed chocolate wafers, melted butter, powdered sugar, and vanilla. Mix until it resembles wet sand.
- Press the base: Spread this mixture evenly in your prepared pan, pressing firmly with the back of a spoon. This creates that signature crunch Bruster’s is famous for!
- First freeze: Pop the pan in the freezer for 30 minutes to set the base layer.
Layering Like a Pro
- Add the first ice cream layer: Remove vanilla ice cream from container and spread it evenly over the frozen crunch layer. Work quickly but gently to avoid breaking the base. ❄️
- Smooth it out: Use an offset spatula dipped in warm water to create a perfectly smooth surface.
- Second freeze: Return to freezer for 45 minutes until firm.
- Add the chocolate layer: Repeat the same process with chocolate ice cream, spreading it evenly over the vanilla layer.
- Final ice cream freeze: Freeze for another 45 minutes until both layers are solid.
The Finishing Touch 🎨
- Prepare whipped topping: In a chilled bowl, whip heavy cream, powdered sugar, and vanilla until soft peaks form. Don’t overwhip!
- Crown your cake: Spread whipped topping over the entire surface, creating decorative swirls with your spatula.
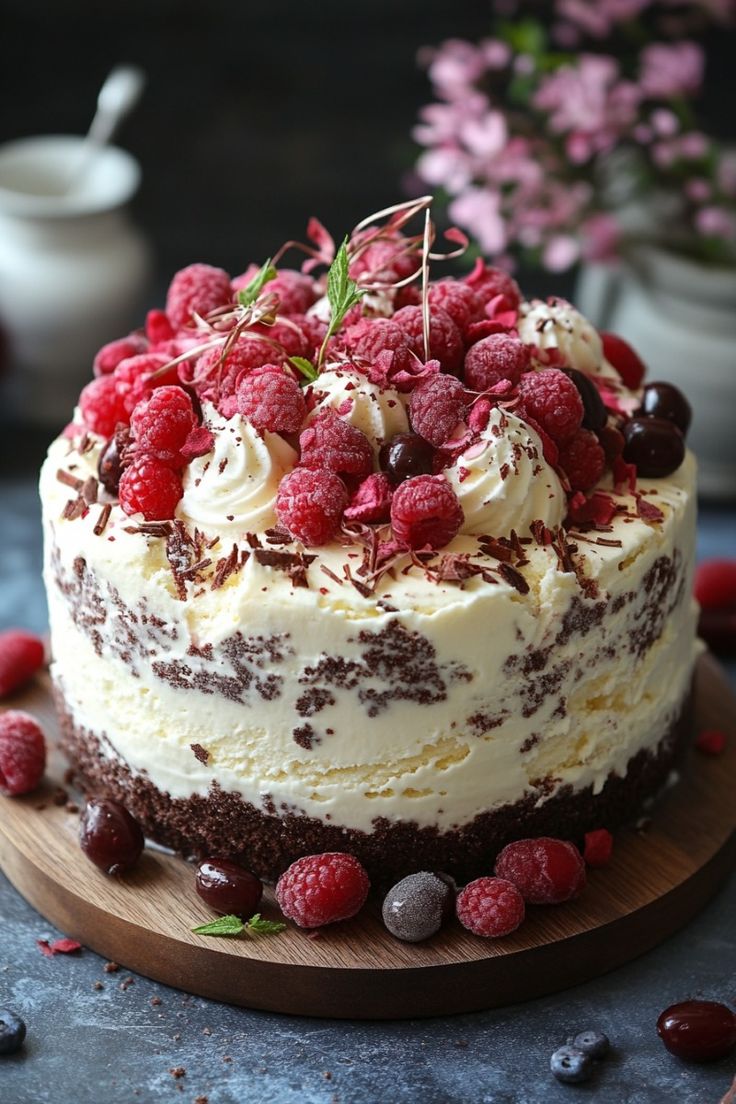
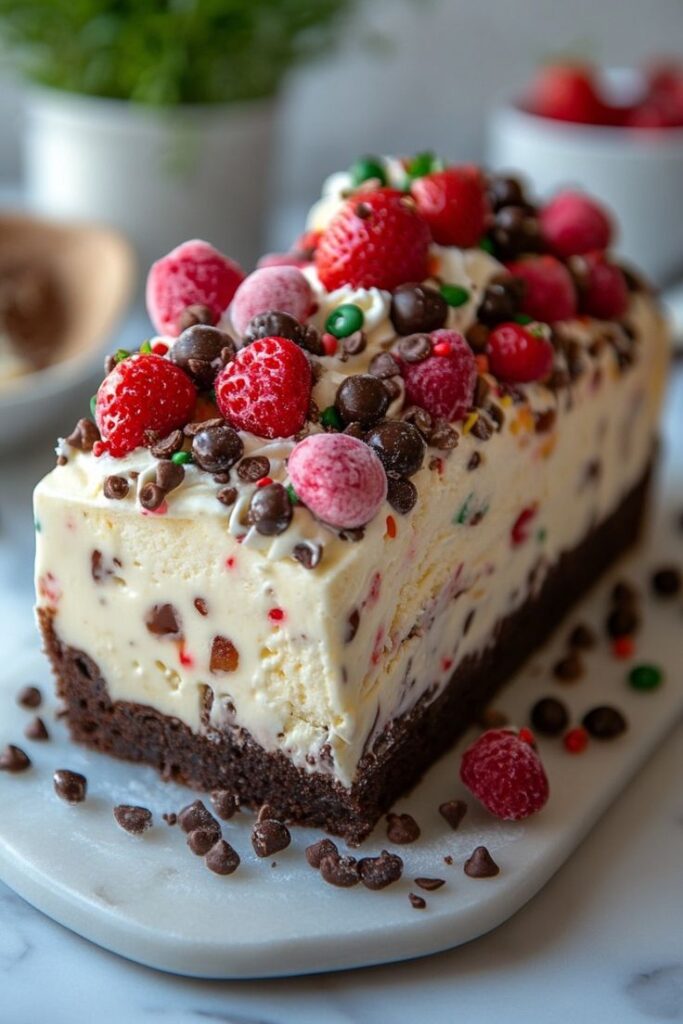
- Add decorations: Sprinkle chocolate chips, add fresh berries, or drizzle with chocolate syrup – make it your own!
- Final freeze: Cover with plastic wrap and freeze for at least 4 hours or overnight.
Pro Tips & Variations for Your Bruster’s Ice Cream Cake
Temperature is everything: Keep your kitchen cool while assembling. If it’s too warm, work in batches, returning the cake to the freezer between steps.
Flavor combinations to try:
- Strawberry and vanilla for a classic twist
- Cookies and cream with chocolate
- Mint chocolate chip with vanilla
Make it extra special: Add a layer of crushed Oreos between ice cream layers for additional texture contrast.
Kid-friendly decorating: Let little ones help with the final decorating step – they love adding sprinkles and berries!
Storage & Serving Tips for Maximum Enjoyment
Storage: Your Bruster’s ice cream cake will stay fresh in the freezer for up to 1 week when properly wrapped. Cover tightly with plastic wrap and aluminum foil to prevent freezer burn.
Serving: Remove from freezer 10-15 minutes before serving to soften slightly for easier cutting. Use a sharp knife dipped in warm water between cuts for clean slices.
Presentation tip: Serve on chilled plates to prevent immediate melting, and have napkins ready – this dessert is gloriously messy in the best way!
Frequently Asked Questions About Ice Cream Cake
Can I make this Bruster’s ice cream cake ahead of time? Absolutely! This cake actually improves after sitting overnight in the freezer. The layers meld together beautifully, creating that authentic ice cream parlor texture.
What if I don’t have chocolate wafer cookies? No problem! Crush up chocolate graham crackers, Oreo cookies (remove filling first), or even chocolate chip cookies. The key is achieving fine, even crumbs.
Is this recipe suitable for large parties? This recipe serves 12-15 people generously. For larger crowds, simply double the recipe and use two pans, or make it in a larger sheet pan.
Can I substitute dairy-free alternatives? Yes! Use coconut whipped cream and dairy-free ice cream alternatives. Just ensure they’re halal-certified and have similar consistency to traditional products.
How do I prevent ice crystals from forming? Press plastic wrap directly onto the surface of your cake before adding the outer covering. This creates an airtight seal that prevents ice crystal formation.
Nutritional Information (Approximate per serving)
- Calories: 385
- Fat: 22g
- Carbohydrates: 42g
- Protein: 6g
- Serving Size: 1 slice (based on 12 servings)
Note: Nutritional values may vary based on specific brands and substitutions used.
Complete Recipe Card for Your Bruster’s Ice Cream Cake
Irresistible Homemade Bruster’s Ice Cream Cake
🕒 Prep Time: 30 minutes | Freeze Time: 6 hours | Total Time: 6 hours 30 minutes
🍽 Servings: 12-15
🧾 Ingredients:
- 2 cups chocolate wafer cookies, crushed
- 4 tablespoons unsalted butter, melted
- 2 tablespoons powdered sugar
- 1 teaspoon vanilla extract
- 1.5 quarts vanilla ice cream, softened
- 1.5 quarts chocolate ice cream, softened
- 2 cups heavy whipping cream, cold
- 1/3 cup powdered sugar
- 1 teaspoon vanilla extract
- 1/4 cup chocolate chips for decoration
👨🍳 Instructions:
- Line 9×13 pan with plastic wrap
- Mix crushed cookies, butter, sugar, and vanilla
- Press mixture into pan base, freeze 30 minutes
- Spread vanilla ice cream over base, freeze 45 minutes
- Add chocolate ice cream layer, freeze 45 minutes
- Whip cream with sugar and vanilla to soft peaks
- Spread whipped topping over cake
- Decorate and freeze 4+ hours before serving
📝 Notes:
- Soften ice cream 15-20 minutes before use
- Dip knife in warm water for clean cuts
- Store covered up to 1 week in freezer
Related Recipes You’ll Absolutely Love
You’ll Also Love This Creamy Vanilla Bean Cheesecake – Another no-bake dessert that’s perfect for special occasions and uses similar techniques to this ice cream cake masterpiece.
Ultimate Chocolate Fudge Brownies That Melt in Your Mouth – The perfect companion to serve alongside your homemade Bruster’s ice cream cake for the ultimate chocolate lovers’ feast.
Ready to create magic in your kitchen? This Bruster’s ice cream cake recipe brings the joy of your favorite ice cream parlor straight to your dining table. Share your beautiful creations with us – we love seeing how you make this recipe your own! 🍰
Tags: Bruster's Ice Cream Cake, Ice Cream Cake