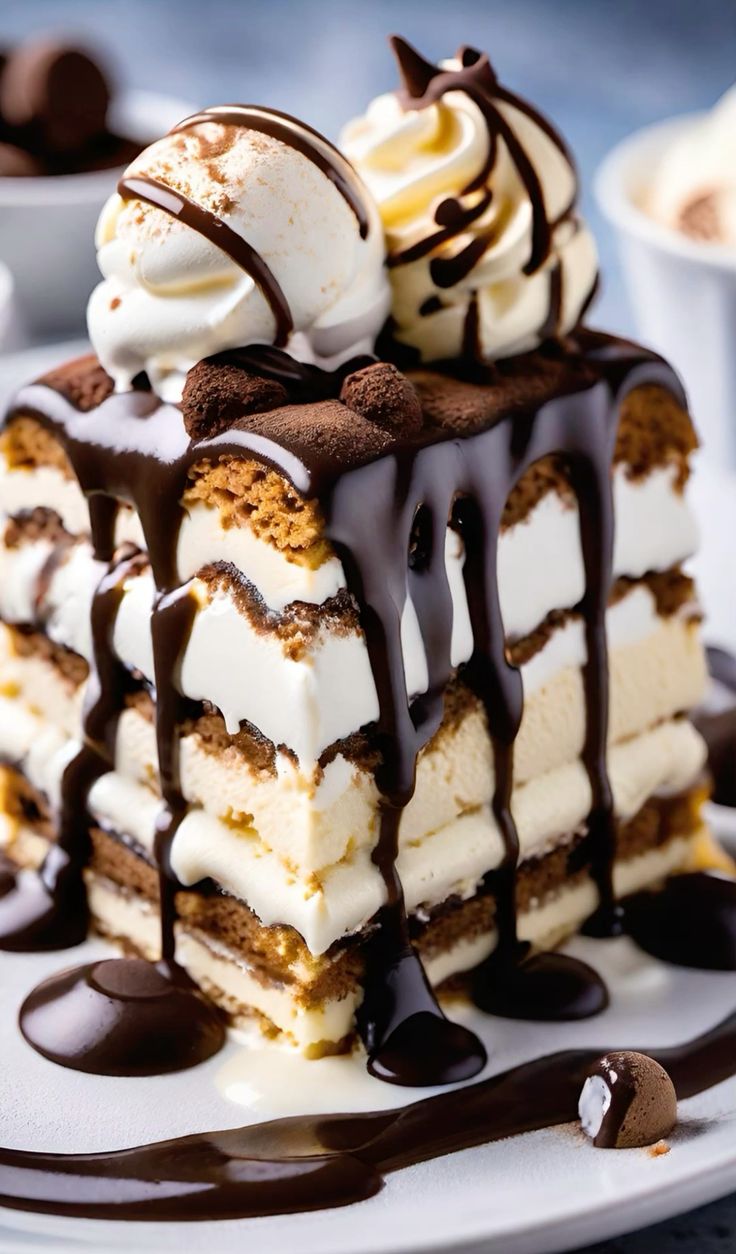
There’s something absolutely magical about the moment when you slice into a perfectly layered ice cream cake. The way the creamy ice cream mingles with soft cake layers, creating that perfect bite that’s both refreshing and indulgent – it’s pure dessert heaven. And when it comes to ice cream cakes, few can match the beloved reputation of Bruster’s ice cream cake.
For those unfamiliar with this delightful treat, Bruster’s Real Ice Cream has been crafting premium ice cream since 1989, becoming synonymous with quality and flavor. Their ice cream cakes have become a staple at birthday parties, graduations, and special celebrations across America. What makes these cakes so special isn’t just the rich, creamy ice cream – it’s the perfect balance of textures and flavors that create an unforgettable dessert experience.
Today, I’m going to share with you my tried-and-tested recipe for creating your own version of this beloved ice cream cake right in your home kitchen. This recipe is perfect for anyone looking to impress guests at a dinner party, celebrate a special milestone, or simply treat their family to something extraordinary. The best part? You can customize every layer to suit your family’s preferences while ensuring all ingredients meet halal dietary requirements.
Whether you’re a seasoned baker or someone who’s never attempted an ice cream cake before, this comprehensive guide will walk you through every step. You’ll learn professional techniques for achieving those picture-perfect layers, discover insider tips for preventing melting mishaps, and explore creative variations that will make your cake uniquely yours.
Table of Contents
Ingredients List
For the Cake Layers:
- 1½ cups all-purpose flour
- 1 cup granulated sugar
- ⅓ cup unsweetened cocoa powder
- 1 teaspoon baking soda
- ½ teaspoon salt
- 1 cup warm water
- ⅓ cup vegetable oil
- 1 tablespoon white vinegar
- 1 teaspoon vanilla extract
For the Ice Cream Layers:
- 2 quarts vanilla ice cream, softened (ensure halal certification)
- 1 quart chocolate ice cream, softened (ensure halal certification)
- 1 cup heavy cream
- ¼ cup powdered sugar
- 1 teaspoon vanilla extract
For the Toppings and Decoration:
- 1 cup chocolate chips (dairy-free if preferred)
- ½ cup crushed chocolate cookies (halal-certified)
- ¼ cup rainbow sprinkles
- 2 tablespoons honey or maple syrup
- Fresh berries for garnish (optional)
Substitution Notes: You can replace the cocoa powder with additional flour for a vanilla cake base. For those avoiding dairy, coconut cream ice cream works beautifully. The vegetable oil can be substituted with melted coconut oil for added richness.
Step-by-Step Instructions
Preparing the Cake Base
- Preheat your oven to 350°F (175°C) and line a 9-inch springform pan with parchment paper. This will make removing your cake layers much easier later on.
- Mix your dry ingredients in a large bowl. Whisk together the flour, sugar, cocoa powder, baking soda, and salt until well combined. Make sure there are no lumps – this ensures an even texture in your finished cake.
- Combine the wet ingredients in a separate bowl. Mix the warm water, vegetable oil, vinegar, and vanilla extract. The vinegar might seem unusual, but it reacts with the baking soda to create a wonderfully light and fluffy cake texture.
- Create your cake batter by gradually adding the wet ingredients to the dry ingredients. Stir until just combined – overmixing can result in a tough cake. The batter should be smooth but not overworked.
- Bake the cake for 25-30 minutes, or until a toothpick inserted in the center comes out clean. Allow it to cool completely in the pan before removing. This patience is crucial – a warm cake will melt your ice cream layers!
Assembling Your Ice cream Cake
- Prepare your assembly area by clearing space in your freezer and having all your ingredients at the ready. Line your springform pan with plastic wrap, leaving overhang for easy removal later.
- Create the first layer by spreading half of the softened vanilla ice cream evenly in the bottom of your prepared pan. Use an offset spatula to achieve smooth, even coverage. Work quickly but don’t rush – you want consistent thickness throughout.
- Add your cake layer by carefully placing the cooled cake on top of the vanilla ice cream. Press down gently to ensure good contact, but don’t compress too much.
- Spread the chocolate ice cream layer over the cake, again working quickly and evenly. This middle layer should be about ¾ inch thick for the perfect bite ratio.
- Complete with the final vanilla layer, smoothing the top surface as best as possible. Cover tightly with plastic wrap and freeze for at least 4 hours, though overnight is preferred.
Final Decoration
- Prepare your whipped cream by beating the heavy cream, powdered sugar, and vanilla extract until stiff peaks form. This will be your “frosting” layer.
- Remove the cake from the freezer 10 minutes before decorating to make spreading easier. Carefully remove from the springform pan using the plastic wrap overhang.
- Apply the whipped cream layer evenly across the top and sides using an offset spatula. Work in sections and don’t worry about perfection – the rustic look is charming!
- Add your final toppings by sprinkling chocolate chips, crushed cookies, and sprinkles as desired. Drizzle with honey or maple syrup for extra sweetness and visual appeal.
Pro Tips & Variations
Temperature Management: The key to a successful ice cream cake is managing temperature throughout the process. Keep your ice cream slightly softened – it should be spreadable but not melted. If it becomes too soft, pop it back in the freezer for 15-20 minutes.
Layer Thickness: Aim for approximately equal thickness in all your ice cream layers. This ensures each bite has the perfect balance of flavors and textures.
Flavor Variations: Don’t feel limited to vanilla and chocolate! Strawberry and vanilla make a lovely combination, while mint chocolate chip and chocolate create a refreshing twist. For summer gatherings, try lemon and berry flavors.
Healthier Options: Substitute frozen yogurt for ice cream to reduce calories, or use sugar-free ice cream varieties. You can also incorporate fresh fruit between layers for added nutrition and natural sweetness.
Make It Extra Special: Consider adding a layer of fudge sauce or caramel between your ice cream layers. Just make sure these additions are halal-certified and don’t contain any prohibited ingredients.
Presentation Tips: For clean, professional-looking slices, dip your knife in warm water between cuts. This prevents the ice cream from sticking and creates those Instagram-worthy cross-sections.
Storage & Reheating Tips
Proper Storage: Your Bruster’s-style ice cream cake will keep in the freezer for up to one month when properly wrapped. Cover tightly with plastic wrap and then aluminum foil to prevent freezer burn and absorption of other freezer odors.
Serving Preparation: Remove the cake from the freezer 10-15 minutes before serving to make slicing easier. This brief thawing period softens the texture just enough for clean cuts without compromising the structural integrity.
Portion Control: Consider pre-slicing your cake and wrapping individual portions separately. This makes serving easier for parties and helps with portion control for families.
Leftover Management: Individual slices can be wrapped in plastic wrap and stored in freezer-safe containers. They’ll maintain quality for up to two weeks and make perfect individual treats.
Frequently Asked Questions
Can I Make This Ice Cream Cake Ahead of Time?
Absolutely! In fact, this ice cream cake is perfect for advance preparation. You can make it up to one week ahead of your event. The flavors actually meld beautifully over time, creating an even more delicious result. Just add the final whipped cream layer and decorative toppings on the day you plan to serve it.
What If My Ice Cream Gets Too Soft During Assembly?
Don’t panic! Simply place the pan in the freezer for 15-20 minutes between layers. This firming-up time actually helps create more distinct layers and prevents the flavors from bleeding into each other. Professional ice cream cake makers use this technique regularly.
Can I Use Store-Bought Cake Instead of Homemade?
Certainly! A store-bought chocolate or vanilla cake layer works perfectly in this recipe. Just ensure it’s completely cooled and fits your pan size. You might need to trim it slightly, but the leftover cake pieces make excellent snacking while you work.
How Do I Prevent the Cake from Becoming Too Hard?
The key is in the serving timing. Remove the cake from the freezer 10-15 minutes before serving, depending on your room temperature. If you live in a very warm climate, 10 minutes is usually sufficient. The goal is to soften it just enough for easy slicing while maintaining the structure.
Can I Make Individual Mini Ice Cream Cakes ?
Yes! This recipe adapts beautifully to muffin tins or small springform pans. Reduce the layer thickness proportionally and adjust freezing time to about 2-3 hours for smaller portions. These individual cakes are perfect for portion control and special dietary needs.
Nutritional Information (Approximate per serving, serves 12)
- Calories: 385
- Total Fat: 18g
- Saturated Fat: 11g
- Cholesterol: 65mg
- Sodium: 245mg
- Total Carbohydrates: 52g
- Dietary Fiber: 3g
- Sugars: 44g
- Protein: 7g
Note: Nutritional values may vary based on specific brands and substitutions used.
Recipe Card
Homemade Bruster’s Style Ice Cream Cake
Prep Time: 45 minutes
Freeze Time: 4+ hours
Total Time: 4 hours 45 minutes
Servings: 12
Ingredients:
- 1½ cups all-purpose flour
- 1 cup granulated sugar
- ⅓ cup cocoa powder
- 1 tsp baking soda
- ½ tsp salt
- 1 cup warm water
- ⅓ cup vegetable oil
- 1 tbsp white vinegar
- 1 tsp vanilla extract
- 2 quarts vanilla ice cream
- 1 quart chocolate ice cream
- 1 cup heavy cream
- ¼ cup powdered sugar
- Toppings as desired
Instructions:
- Bake chocolate cake layer and cool completely
- Layer softened vanilla ice cream in springform pan
- Add cake layer
- Add chocolate ice cream layer
- Top with remaining vanilla ice cream
- Freeze 4+ hours
- Decorate with whipped cream and toppings
- Serve immediately
Notes:
- Ensure all ingredients are halal-certified
- Work quickly with softened, not melted, ice cream
- Allow 10-15 minutes thawing time before serving
If you enjoyed making this delicious Bruster’s ice cream cake, you might also love trying a classic vanilla bean cheesecake or exploring homemade frozen yogurt recipes. Both offer that same satisfying combination of creamy textures and customizable flavors that make dessert time truly special.
