1. 🎨 The Permanent Marker Technique: Precision and Simplicity
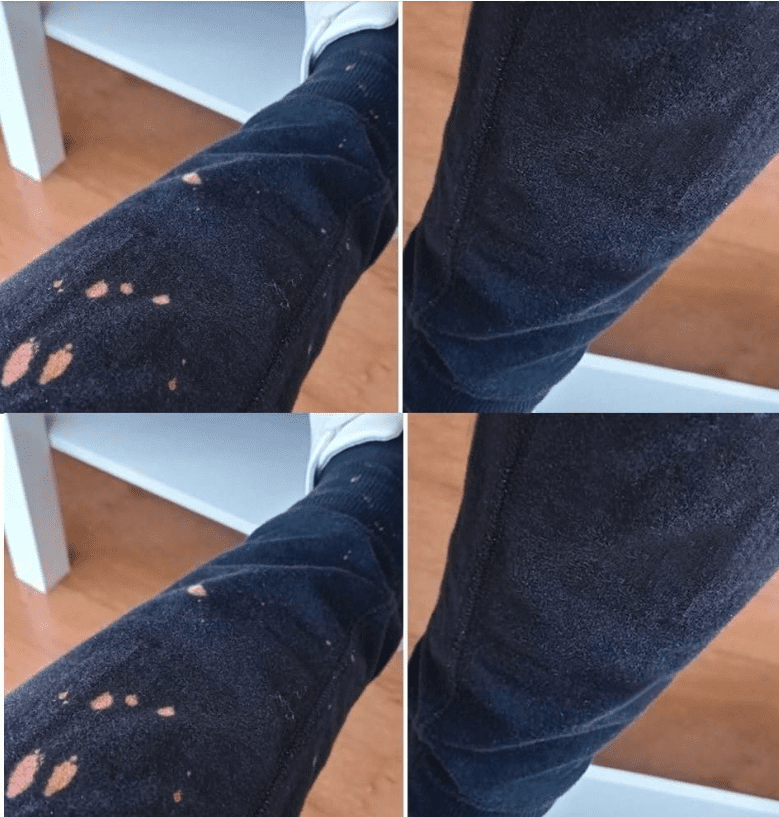
This is my go-to method for small, scattered bleach spots, like the ones pictured on the joggers. It relies on the simple, yet effective, concept of spot-coloring the affected area with an alcohol-based permanent marker.
The Science Behind It
Permanent markers contain pigments and fast-drying solvents. When applied directly to a small bleached spot, the pigment soaks into the exposed, colorless fibers, mimicking the original dye. The color will set permanently and, if done correctly, will withstand multiple washes.
What You’ll Need:
- A High-Quality Permanent Marker: Choose one that exactly matches the color of your garment. Black is the easiest, but for navy or brown, you may need a specialty fabric marker.
- A piece of Cardboard or a Towel.
H4: Step-by-Step Application
- Preparation: Turn the garment inside-out and slip the cardboard or towel underneath the stained area. This prevents the marker from bleeding onto the other side of the fabric.
- Test and Match: On a hidden seam or hem inside the garment, gently draw a small line with the marker. Let it dry for a minute and check the color match under good lighting. This is crucial for seamless blending.
- The Coloring Process: Using the very tip of the marker, gently dab or lightly stroke the bleached area. Do not press hard or saturate the fabric. Work from the outside edges of the spot inward.
- Blending: Stop before the spot is completely covered. Let it dry for 5 minutes. The color will deepen slightly as it dries. Apply a second, very light layer if needed. The key is to build the color slowly to blend it with the surrounding, intact fabric.
- Setting: Once satisfied, let the area dry completely for at least 24 hours before washing. Wash the item alone the first time to ensure no residual ink transfers.
2. 🧪 The Fabric Paint or Fabric Medium Method: For Larger or Faded Areas
If you have a larger patch of discoloration (e.g., a spill instead of a splatter) or if the fabric is a non-standard color that a marker can’t match, this technique provides more control and a wider color palette. It involves using a specialized product that is designed to permanently adhere color to fabric fibers.
The Science Behind It
Using textile paint or a fabric medium allows you to mix custom colors and apply the pigment with a controlled tool, such as a fine brush or cotton swab. Unlike craft acrylics, fabric-specific paints remain soft and flexible after drying and are formulated to be washable.
What You’ll Need:
- Fabric Paint or Fabric Medium: A pure black, blue, or other base color. If using a medium, you’ll mix it with high-quality acrylic paint.
- Small, Fine-Tipped Paintbrush or Cotton Swab.
- Cardboard or Towel for backing.
- A Mixing Pallette or Small Dish.
H4: Step-by-Step Application
- Prepare the Area: Just like the marker method, place your backing material inside the garment under the stain.
- Color Match (The Hard Part!): Mix your fabric paint until it perfectly matches the dry color of the surrounding, unbleached fabric. Always mix a shade slightly lighter than you think you need, as it will darken when wet and upon drying. Test your mixed color on an inconspicuous area first.
- Targeted Application: Load the fine-tipped brush or cotton swab with a small amount of the mixed color.
- Dab, Don’t Brush: Gently dab the color onto the bleached area, working to fill the exposed white or pink fibers. Avoid getting the paint on the surrounding good fabric.
- Feather the Edges: Use a very dry brush or a clean cotton swab to lightly feather the edges of the painted area into the surrounding fabric. This helps to eliminate a hard line and achieve a seamless transition.
- Curing/Setting: Follow the instructions on your fabric paint for curing. Most require allowing the paint to air-dry for 24-72 hours, followed by heat setting (usually pressing with an iron for a specified time) to make the color truly permanent and washable.
🛡️ Prevention is the Best Fix
While these techniques are lifesavers, the best way to deal with bleach stains is to avoid them entirely!
- Always wear an old apron or shirt when handling cleaning chemicals.
- If you’re using liquid bleach, pour it slowly and away from your clothing.
- Keep a spray bottle of water and a clean rag handy. If you spot a tiny splash immediately, quickly blotting it with water and a mild detergent might dilute the chemical enough to prevent major damage.
Don’t let a tiny stain ruin a great piece of clothing. With a little precision and the right tools, you can often make those accidental bleach spots vanish into thin air! Give these methods a try and let me know which one worked for your garment!
