You will no longer buy bread once you discover the absolute joy and simplicity of baking a professional-grade crusty loaf in your own kitchen. This foolproof recipe transitions you from a consumer to a master baker with minimal effort. By using a heavy pot and a few basic ingredients, you will achieve that bakery-style crunch and airy interior every single time.
Table of Contents
The Secret to Why You Will No Longer Buy Bread
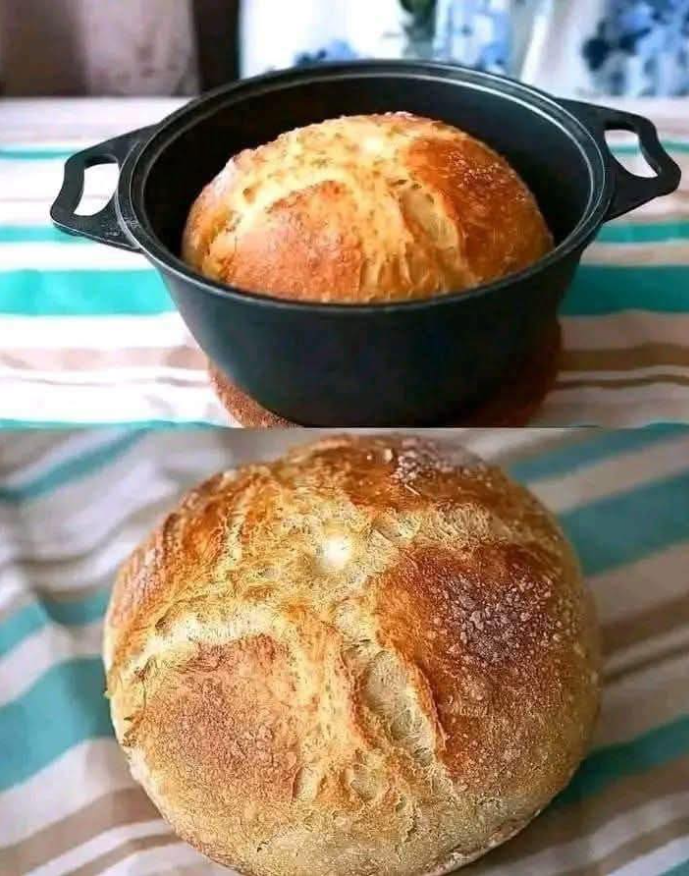
The magic of this specific method lies in the “Dutch Oven” technique. For years, home bakers struggled to replicate the thick, crackling crust found in artisanal bacheries because home ovens vent out steam too quickly. When you bake your dough inside a preheated cast-iron pot, the moisture from the dough is trapped, creating a self-steaming environment. This allows the bread to expand fully before the crust sets, resulting in those beautiful, rustic cracks you see in the photos. Once you taste the difference between a fresh, chemical-free homemade loaf and a store-bought one, you will no longer buy bread from the supermarket again. 🍞
Ingredients for Your Homemade Loaf
- 3 cups (375g) All-purpose flour or Bread flour
- 1 ½ cups (350ml) Warm water (about 40°C)
- 1 ½ teaspoons Salt
- ½ teaspoon Active dry yeast
- Extra flour for dusting
| Category | Duration |
| Total Time | 3 Hours 45 Minutes |
| Prep Time | 15 Minutes |
| Cook Time | 45 Minutes |
| Cool Time | 45 Minutes |
Step-by-Step Preparation
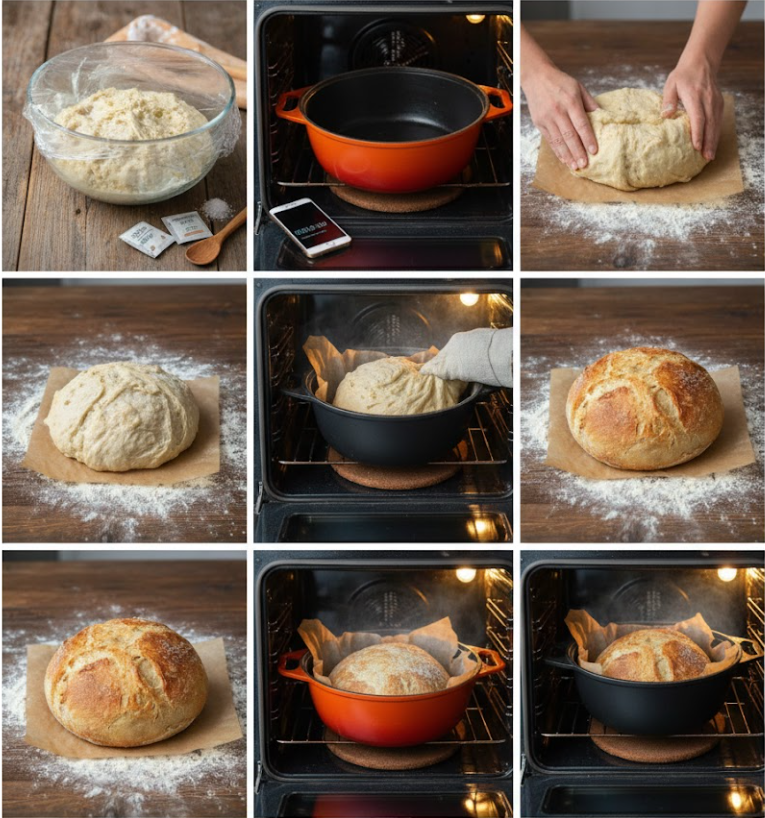
1. Mix the Dough: In a large glass bowl, whisk together the flour, salt, and yeast. Pour in the warm water and stir with a wooden spoon until a shaggy, sticky ball forms. There is no need for intense kneading; just ensure all the flour is hydrated.
2. First Rise: Cover the bowl with plastic wrap or a damp cloth. Let it sit in a warm, draft-free spot for about 2 to 3 hours, or until it has doubled in size and looks bubbly on top.
3. Preheat the Pot: Place your empty Dutch oven (with the lid) into the oven. Preheat the oven to 230°C. Let the pot get screaming hot for at least 30 minutes.
4. Shape the Loaf: Turn the dough out onto a well-floured surface. Gently fold the edges toward the center to form a round ball. Place the dough onto a piece of parchment paper. 🥖
5. Bake with Steam: Carefully remove the hot pot from the oven. Lift the dough using the parchment paper and drop it into the pot. Cover with the lid and bake at 230°C for 30 minutes.
6. The Final Crunch: Remove the lid and bake for another 12–15 minutes until the crust is a deep golden brown. Carefully remove the bread and let it cool on a wire rack before slicing.
Practical Benefits of Baking at Home
Beyond the incredible flavor, the primary reason you will no longer buy bread is the health factor. Commercial loaves often contain preservatives, sugar, and conditioners to extend shelf life. When you bake at home, you control exactly what goes into your body. Additionally, the cost of flour, water, and yeast is a fraction of the price of a premium artisanal loaf at the store. 💸
Nutrition Facts (Per Serving)
- Calories: 145 kcal
- Total Fat: 0.5g
- Sodium: 290mg
- Carbohydrates: 30g
- Fiber: 1.5g
- Protein: 4g
Serving and Storage Tips
This bread is best served slightly warm with a thick slab of butter or dipped into high-quality olive oil and balsamic vinegar. Because it lacks preservatives, it is best eaten within 2 days. To store, wrap the cooled loaf in a brown paper bag to maintain the crust’s texture. For longer storage, slice the bread and freeze it in a sealed bag; you can toast the slices directly from the freezer for a “just-baked” taste every morning. 🥪
Frequently Asked Questions
Can I use whole wheat flour?
Yes, but whole wheat is denser. I recommend starting with a 50/50 mix of white and whole wheat flour to ensure the bread still rises well and stays airy.
What if I don’t have a Dutch oven?
You can use any heavy, oven-safe pot with a tight-fitting lid (like Pyrex or ceramic), provided it can handle the 230°C heat.
My dough is too sticky to handle, what do I do?
Don’t panic! This is a high-hydration dough. Use plenty of flour on your hands and the work surface. The stickiness is what creates those beautiful air pockets inside the bread.
Baking your own bread is a rewarding ritual that fills your home with an unbeatable aroma. It is a simple skill that yields professional results with very little active work. Once you master this golden, crusty loaf, the convenience of the grocery store will lose its appeal, and you will no longer buy bread ever again.
Try this recipe over the weekend and let us know how your first loaf turns out. Did you get that perfect “crunch” when you sliced into it? Share your results and your favorite toppings with the community!
