Sugar-free condensed milk with just 3 ingredients might sound too good to be true, but I’m about to share a recipe that will revolutionize your kitchen and your health. If you’ve been searching for a way to enjoy the creamy, rich taste of condensed milk without the sugar overload, you’ve landed in exactly the right place.
As someone who’s spent years experimenting in the kitchen, I can confidently say this is one of those rare recipes that checks every box: it’s easy, delicious, economical, and actually good for you. Whether you’re managing diabetes, following a keto lifestyle, or simply trying to reduce your sugar intake, this recipe is about to become your new best friend.
Table of Contents
Why Make Your Own Sugar-Free Condensed Milk?
Before we dive into the recipe, let’s talk about why making your own sugar-free condensed milk is such a brilliant idea.
The Health Benefits
Traditional condensed milk is loaded with sugar—we’re talking about 166 grams of sugar per cup. That’s more than three days’ worth of recommended sugar intake in a single cup! By making your own sugar-free version, you eliminate this massive sugar bomb while still enjoying the creamy texture and sweet taste you love.
For people with diabetes, pre-diabetes, or anyone watching their blood sugar levels, this recipe offers a safe way to enjoy desserts and coffee drinks without the glucose spike.
The Cost Savings
Have you checked the price of sugar-free condensed milk at specialty stores? If you can even find it, you’ll pay premium prices. Making your own costs a fraction of store-bought versions, and you probably already have the ingredients in your pantry.
Complete Control Over Ingredients
When you make your own, you know exactly what’s going into your body. No preservatives, no artificial colors, no mystery additives—just pure, wholesome ingredients you can pronounce.
The 3-Ingredient Sugar-Free Condensed Milk Recipe
Now, let’s get to what you came here for—the recipe itself.
Ingredients You’ll Need
- 2 cups whole milk (or your preferred milk—more on alternatives later)
- 1/2 cup heavy cream (for that rich, luxurious texture)
- 1/2 cup sugar substitute (erythritol, stevia, or monk fruit sweetener work beautifully)
That’s it. Three simple ingredients that transform into something magical.
Step-by-Step Instructions
Step 1: Combine Your Ingredients
Pour the milk and heavy cream into a medium-sized, heavy-bottomed saucepan. The heavy bottom is important—it distributes heat evenly and prevents scorching.
Add your sugar substitute and whisk everything together until the sweetener begins to dissolve. Don’t worry if it doesn’t dissolve completely at this stage; it will as the mixture heats.
Step 2: The Simmering Process
Place your saucepan over medium heat and bring the mixture to a gentle simmer. Here’s where patience becomes your secret ingredient.
Once it reaches a simmer, reduce the heat to medium-low. You want a gentle, consistent bubble—not a rolling boil. A vigorous boil will cause the milk to reduce too quickly and potentially scorch.
Stir occasionally to prevent the milk from sticking to the bottom of the pan. This is a great time to catch up on your favorite podcast or scroll through your phone, as you’ll be here for about 45-60 minutes.
Step 3: Watch for the Magic
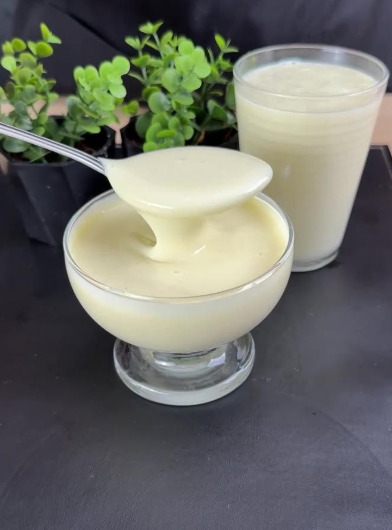
As the mixture simmers, it will gradually reduce and thicken. You’re looking for it to reduce by about half its original volume. The mixture should coat the back of a spoon and have a consistency similar to heavy cream.
The color will deepen slightly, taking on a beautiful ivory tone. This is the natural caramelization of the milk proteins—a sign you’re on the right track.
Step 4: Test for Doneness
After about 45 minutes, start checking your condensed milk. Dip a spoon into the mixture and run your finger across the back. If it leaves a clear line that doesn’t immediately run, you’re done.
Remember, the mixture will continue to thicken as it cools, so don’t overdo it. It should be slightly thinner than your desired final consistency.
Step 5: Cool and Store
Remove the saucepan from heat and let it cool to room temperature. As it cools, give it an occasional stir to prevent a skin from forming on top.
Once cooled, transfer your sugar-free condensed milk to a clean glass jar or airtight container. It will keep in the refrigerator for up to two weeks—though in my experience, it rarely lasts that long!
Pro Tips for Perfect Sugar-Free Condensed Milk Every Time
Choose the Right Sweetener
Not all sugar substitutes are created equal when it comes to cooking. Here’s what I’ve learned through trial and error:
Erythritol: This is my personal favorite. It measures cup-for-cup like sugar, doesn’t have a bitter aftertaste, and handles heat beautifully. The slight cooling sensation it can create actually works well in condensed milk.
Monk Fruit Sweetener: Offers a clean, sweet taste without any aftertaste. Make sure you’re using a monk fruit blend designed for baking, as pure monk fruit extract is extremely concentrated.
Stevia: Works well but can have a slightly bitter aftertaste if you use too much. Start with less than you think you need and adjust to taste.
Avoid: Artificial sweeteners like aspartame or saccharin, which break down at high temperatures and can develop off-flavors.
Don’t Rush the Process
The single biggest mistake people make is trying to speed up the reduction by cranking up the heat. This leads to scorched milk, uneven texture, and a burnt taste that no amount of sweetener can mask.
Low and slow wins this race every time. Put on some music, do some light kitchen prep, and let time do its work.
Stir, But Not Too Much
Occasional stirring is important to prevent sticking, but constant stirring can actually slow down the reduction process. Every three to five minutes is plenty.
Customizing Your Sugar-Free Condensed Milk
Once you’ve mastered the basic recipe, the world of customization opens up.
Flavor Variations
Vanilla: Add a teaspoon of pure vanilla extract during the last five minutes of cooking for a classic vanilla condensed milk.
Chocolate: Whisk in 2-3 tablespoons of unsweetened cocoa powder with the initial ingredients for a chocolate version that’s perfect for desserts.
Coconut: Replace half the milk with coconut milk for a tropical twist that’s amazing in coffee and Thai-inspired desserts.
Cinnamon: Add a cinnamon stick to the saucepan while simmering for a warm, spiced version perfect for fall baking.
Dairy-Free Alternatives
Yes, you can make this recipe dairy-free! Here’s how:
Replace the whole milk with unsweetened almond milk, oat milk, or cashew milk. For the cream, use full-fat coconut cream from a can (the solid part at the top).
Keep in mind that non-dairy versions may require slightly less cooking time and will have a subtly different flavor profile. Coconut cream versions work particularly well and create an incredibly rich final product.
Creative Ways to Use Your Sugar-Free Condensed Milk
Now that you’ve made this magical ingredient, what do you do with it? The possibilities are endless, but here are my favorite uses:
In Your Morning Coffee
A tablespoon or two of sugar-free condensed milk transforms ordinary coffee into a creamy, lightly sweetened treat. It’s like having a coffee shop experience at home—without the sugar crash an hour later.
Baking Applications
Use it anywhere traditional condensed milk is called for: key lime pie, fudge, magic cookie bars, tres leches cake, or cheesecake. Your sugar-free version performs exactly like the original.
Dessert Sauces
Drizzle it over fresh fruit, sugar-free ice cream, or use it as a dip for strawberries. It’s elegant enough for entertaining but simple enough for a weeknight treat.
Homemade Ice Cream
Sugar-free condensed milk is the secret weapon for making no-churn ice cream. Mix it with whipped cream and your desired flavorings, freeze, and you’ve got incredible ice cream without an ice cream maker.
Vietnamese Iced Coffee
For an authentic Vietnamese iced coffee experience without the sugar spike, combine strong brewed coffee with your sugar-free condensed milk over ice. It’s refreshing, energizing, and absolutely delicious.
Troubleshooting Common Issues
Even with a simple three-ingredient recipe, questions come up. Here are solutions to the most common problems:
My Condensed Milk Is Grainy
This typically happens with certain sweeteners, particularly erythritol, which can crystallize as it cools. Solution: blend your cooled condensed milk in a blender for 30 seconds to create a perfectly smooth texture.
It’s Too Thin
If your condensed milk isn’t thick enough after cooling, simply return it to the heat and simmer for another 10-15 minutes. Check consistency frequently.
It’s Too Thick
Added too much heat or cooked it too long? No problem. Whisk in a tablespoon or two of milk or cream until you reach your desired consistency.
It Tastes Burnt
Unfortunately, once milk is scorched, there’s no fixing the flavor. Start over, use lower heat, and stir more frequently. Think of it as a learning experience—even the best cooks burn something occasionally.
Storing and Food Safety
Proper storage is key to keeping your sugar-free condensed milk fresh and safe to consume.
Refrigeration
Always store your condensed milk in the refrigerator in an airtight container. Glass jars work beautifully and don’t absorb odors like plastic can.
Properly stored, it will last 10-14 days. Mark your container with the date you made it so you can keep track.
Freezing
Yes, you can freeze sugar-free condensed milk! Pour it into ice cube trays for easy portioning, or freeze in freezer-safe containers. It will keep for up to three months.
Thaw in the refrigerator overnight before using. Give it a good stir after thawing, as separation may occur.
Signs It’s Gone Bad
Trust your senses. If your condensed milk develops an off smell, unusual color, or mold, discard it immediately. When in doubt, throw it out.
The Economics: Breaking Down the Cost
Let’s talk money. One of the biggest advantages of making your own sugar-free condensed milk is the cost savings.
A typical can of regular condensed milk costs around $2-3. Sugar-free versions, when you can find them, run $6-8 or more.
Your homemade version costs approximately:
- Milk: $0.50
- Heavy cream: $0.75
- Sweetener: $0.50-1.00 (depending on which sweetener you choose)
Total cost: $1.75-2.25
You’re saving money while getting a superior product. Plus, you can make exactly the amount you need—no waste, no half-empty cans taking up refrigerator space.
Why This Recipe Works
From a culinary science perspective, condensed milk is simply milk with most of its water content removed and sweetness added. By gently simmering milk and cream, we encourage water evaporation while the milk proteins and fats concentrate, creating that signature thick, creamy texture.
The sugar in traditional recipes serves two purposes: sweetness and preservation. Our sugar substitutes handle the sweetness, and refrigeration handles the preservation.
The addition of heavy cream isn’t just about richness—the higher fat content helps create that luxurious mouthfeel and helps the mixture reduce more evenly.
Final Thoughts
Sugar-free condensed milk with just 3 ingredients isn’t just a recipe—it’s a kitchen revelation. It proves that healthy eating doesn’t mean sacrificing flavor or texture. It shows that taking control of your ingredients doesn’t have to be complicated or expensive.
Whether you’re making this for health reasons, dietary preferences, or simply because you love a good kitchen project, I hope this recipe becomes a staple in your cooking repertoire.
The next time someone asks how you make such delicious sugar-free desserts, you can share this secret weapon. Because great food should be accessible to everyone, regardless of dietary restrictions.
Now, what are you waiting for? Those three ingredients are calling your name. Get in the kitchen and discover just how easy, delicious, and economical homemade sugar-free condensed milk can be.
Happy cooking!
