
A Match Made in Dessert Heaven
There are moments in life when you bite into something so perfectly balanced—so decadently delicious—that you can’t help but close your eyes and smile. That’s the experience I want you to have with these decadent raspberry brownie cheesecake bars. It’s the moment when chocolate fudginess meets silky cheesecake creaminess and bright raspberry tartness, all in one glorious bite.
I first discovered this magical combination while experimenting in my kitchen on a rainy afternoon. I was craving something chocolatey, something creamy, and something fruity all at once—but I couldn’t decide which dessert to make. So, I did what any dessert enthusiast would do: I threw caution to the wind and decided to create all three in one dessert. The result? These decadent raspberry brownie cheesecake bars that have since become my go-to recipe whenever I want to impress friends, celebrate an occasion, or simply treat myself.
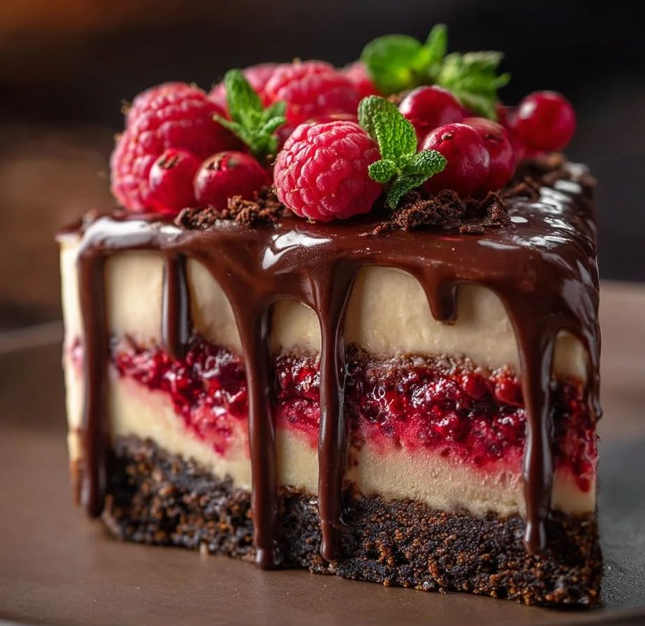
What makes these bars so special is the combination of textures and flavors. The fudgy brownie base provides that rich chocolate foundation we all crave, the creamy cheesecake layer brings elegance and sophistication, and the tart raspberries cut through the richness with brightness and freshness. Whether you’re hosting a dinner party, bringing a dessert to a potluck, or looking for something special to bake for your family, these decadent raspberry brownie cheesecake bars are your answer.
These bars are also completely halal-friendly, made with ingredients you can feel good about serving to everyone at your table. They’re the kind of treat that begs to be shared and savored slowly.
Table of Contents
Ingredients You’ll Need for These Decadent Raspberry Brownie Cheesecake Bars
For the Brownie Layer:
- 1 cup (225g) unsalted butter
- 8 oz (225g) semi-sweet or dark chocolate, chopped
- 1 cup (200g) granulated sugar
- 3 large eggs
- 1 teaspoon vanilla extract
- ¾ cup (90g) all-purpose flour
- ¼ cup (25g) unsweetened cocoa powder
- ½ teaspoon baking powder
- ¼ teaspoon salt
For the Cheesecake Layer:
- 16 oz (450g) cream cheese, softened to room temperature
- ½ cup (100g) granulated sugar
- 2 large eggs
- 1 teaspoon vanilla extract
- ¼ cup (60ml) heavy cream or sour cream
For the Raspberry Topping:
- 1½ cups (190g) fresh raspberries (frozen raspberries work too, but don’t thaw them)
- 2 tablespoons granulated sugar
- 1 tablespoon lemon juice
- 1 tablespoon cornstarch (or arrowroot powder for a glossier finish)
Optional Garnish:
- 2 tablespoons powdered sugar for dusting
- 1 tablespoon dark chocolate shavings
Step-by-Step Instructions for Perfect Decadent Raspberry Brownie Cheesecake Bars
Step 1: Prepare Your Baking Pan
Preheat your oven to 350°F (175°C). Line a 9×13-inch baking pan with parchment paper, making sure to leave some overhang on the sides—this makes removal so much easier later. Lightly grease the parchment with butter or cooking spray. This simple step prevents your beautifully baked bars from sticking to the pan.
Step 2: Make the Brownie Base
In a microwave-safe bowl, combine the chopped chocolate and 1 cup of butter. Microwave in 30-second intervals, stirring between each interval, until completely melted and smooth. This usually takes about 1-2 minutes total. You want to be careful not to overheat the chocolate, as it can become grainy or burnt.
In a separate large mixing bowl, whisk together 1 cup of sugar and 3 eggs until the mixture becomes pale and slightly fluffy—this should take about 2-3 minutes with an electric mixer. This step incorporates air into the batter, which helps create those fudgy, dense brownie qualities we’re after.
Gently fold the melted chocolate mixture into the egg and sugar mixture until just combined. Stir in 1 teaspoon of vanilla extract. In another bowl, whisk together ¾ cup flour, ¼ cup cocoa powder, ½ teaspoon baking powder, and ¼ teaspoon salt. Fold the dry ingredients into the wet ingredients until just combined—don’t overmix, as this can lead to tough brownies.
Pour the brownie batter into your prepared pan and spread it evenly. Bake for 12-14 minutes at 350°F. The brownie layer should be mostly set but still slightly soft in the center—it doesn’t need to be fully baked at this point since we’re adding more layers on top.
Step 3: Prepare the Cheesecake Layer
While the brownie layer is baking, prepare your cheesecake mixture. Using an electric mixer, beat 16 oz of softened cream cheese until completely smooth and creamy—this takes about 1-2 minutes. Scrape down the sides of your bowl occasionally to ensure everything is well combined.
Add ½ cup of sugar to the cream cheese and continue beating until light and fluffy, about another 2 minutes. One at a time, add 2 eggs, beating on low speed after each addition just until combined. Overmixing at this stage can incorporate too much air and create cracks in your cheesecake layer, which we want to avoid.
Gently stir in 1 teaspoon vanilla extract and ¼ cup of heavy cream or sour cream until the mixture is smooth and pourable but still thick. The cream helps create a slightly lighter texture while maintaining that classic cheesecake richness.
Step 4: Layer and Bake
Remove the brownie layer from the oven. It should be partially baked but not completely firm. Carefully pour the cheesecake mixture over the warm brownie layer, spreading it evenly with a spatula or the back of a spoon. Try to work gently so you don’t disturb the brownie layer too much.
Return the pan to the oven and bake for an additional 15-18 minutes. The cheesecake layer should be set around the edges but still have a slight jiggle in the very center when you gently shake the pan—this is perfect. Don’t overbake the cheesecake, as this can cause cracking.
Step 5: Add the Raspberry Layer
While your bars are baking, prepare your raspberry topping. In a small bowl, gently toss 1½ cups of fresh raspberries with 2 tablespoons sugar, 1 tablespoon lemon juice, and 1 tablespoon cornstarch. If using frozen raspberries, keep them frozen and don’t thaw them—they’ll release less liquid. Let this mixture sit for a couple of minutes to allow the juices to begin releasing slightly.
Once the cheesecake layer is set but still warm from the oven, carefully scatter the raspberry mixture evenly over the top. Try to distribute the raspberries and their juices evenly across the entire surface.
Return the pan to the oven for another 8-10 minutes. This brief baking time allows the raspberry juices to create a beautiful, glossy topping that sets just enough to hold together, while the raspberries soften slightly and release their natural flavor into the cheesecake layer.
Step 6: Cool Completely
This is the hardest step, but it’s crucial: remove your pan from the oven and let it cool completely at room temperature for at least 2 hours. During this time, the layers will set and bind together. Don’t rush this step, even though the bars might smell absolutely heavenly.
Once cooled to room temperature, transfer the pan to the refrigerator and chill for at least 4 hours, preferably overnight. This chilling time allows the cheesecake to set completely and the flavors to meld beautifully. Cold bars are also much easier to cut cleanly.
Step 7: Cut and Serve
When you’re ready to serve, remove the pan from the refrigerator about 10 minutes before cutting. Using a long, sharp knife (a serrated knife works wonderfully), cut the bars into your desired size. For clean edges, dip your knife in hot water and wipe it clean between each cut. This simple trick prevents the layers from sticking together and creating messy cuts.
If desired, dust each bar lightly with powdered sugar or add a few dark chocolate shavings for a finishing touch. Serve immediately and watch your guests light up!
Pro Tips for Picture-Perfect Decadent Raspberry Brownie Cheesecake Bars
Tip 1: Room Temperature Ingredients Matter Always bring your cream cheese to room temperature before mixing. Cold cream cheese can create lumps that won’t blend smoothly into your cheesecake layer. The same goes for eggs—room temperature eggs blend more evenly throughout your batter, creating a smoother texture.
Tip 2: Don’t Skip the Parchment Paper I cannot stress this enough—that parchment paper overhang is your best friend. Not only does it prevent sticking, but it also allows you to lift the entire baked dessert out of the pan for cleaner presentation and easier storage.
Tip 3: Use a Water Bath for Extra Creaminess (Optional) For an even creamier cheesecake layer, place your baking pan inside a larger roasting pan filled with about 1 inch of hot water. This creates a water bath that promotes gentle, even baking and reduces cracking. Just be careful when removing hot water from the oven.
Tip 4: Freeze Fresh Raspberries Before Adding If using fresh raspberries and you want to prevent them from sinking into the layers below, lightly toss them in a tiny amount of flour before adding them. You can also partially freeze them first—they’ll hold their shape better during baking.
Tip 5: Toast Your Cocoa Powder (Advanced Technique) For an even deeper chocolate flavor, lightly toast your cocoa powder in a dry skillet over low heat for about 2 minutes before adding it to your brownie mixture. This intensifies the chocolate notes and adds complexity.
Delicious Variations to Try
Dark Chocolate Lover’s Version Substitute the semi-sweet chocolate with dark chocolate (70% cacao or higher) in the brownie layer. You can also add 1 tablespoon of espresso powder to the brownie mixture for a deeper chocolate intensity that plays beautifully with the tartness of the raspberries.
Blackberry and Blueberry Twist Swap the raspberries for blackberries, blueberries, or even a mix of all three berries. Each berry brings its own personality—blackberries are earthier, blueberries are subtly sweet, and raspberries provide that classic tartness.
White Chocolate Version For a lighter, sweeter variation, use white chocolate in the brownie layer (though you’ll technically be making “blonde brownies”). The white chocolate’s buttery sweetness complements raspberries beautifully.
Healthier Option Reduce the sugar in each layer by 2-3 tablespoons, and add 1 tablespoon of honey or maple syrup for natural sweetness. You can also substitute all-purpose flour with whole wheat pastry flour for added nutritional value. The bars will be slightly less sweet but still deeply satisfying.
Nutella Lover’s Dream Swirl 2-3 tablespoons of Nutella into your cheesecake layer before topping with raspberries for a hazelnut-chocolate twist.
Storage and Reheating Guide for Your Bars
Short-Term Storage
Store your decadent raspberry brownie cheesecake bars in an airtight container in the refrigerator for up to 5 days. Layer them with parchment paper between each bar if stacking them to prevent them from sticking together or damaging the topping.
Freezing Instructions
These bars freeze beautifully for up to 3 months! After the bars have cooled and set, cut them into individual portions and wrap each bar tightly in plastic wrap, then place them in a freezer-safe container or zip-top bag. When you’re ready to enjoy them, simply thaw at room temperature for about 30 minutes, and they’ll be just as delicious as the day you made them.
Serving Your Bars
These bars are best served cold or at room temperature—never serve them warm, as the layers will be too soft and will lose their distinct identity. If your bars have been sitting out, you can chill them briefly before serving for a firmer texture.
Reheating Tips
If you’ve stored your bars and want to refresh them slightly, you can warm them very gently in a 250°F oven for 5-8 minutes just until they’re room temperature. Avoid using the microwave, as this can cause uneven heating and ruin the texture of the cheesecake layer.
Frequently Asked Questions About Decadent Raspberry Brownie Cheesecake Bars
Can I make decadent raspberry brownie cheesecake bars ahead of time?
Absolutely! In fact, making these bars a day ahead is ideal. The flavors have time to meld together, and the layers set even more firmly. You can prepare them up to 5 days in advance and store them in the refrigerator. Just make sure to keep them covered.
Can I freeze these bars?
Yes, these bars freeze wonderfully for up to 3 months! Wrap each bar individually in plastic wrap and place them in a freezer-safe container. Thaw at room temperature for 30 minutes before serving.
What if I don’t have fresh raspberries?
Frozen raspberries work equally well—in fact, many bakers prefer them because they maintain their shape better during baking. Don’t thaw them; add them directly to your mixture straight from the freezer. Dried raspberries can also work, but they won’t create that beautiful juicy topping.
Why did my cheesecake layer crack?
Cracks typically occur from overbaking or rapid temperature changes. Make sure not to overbake the cheesecake layer—it should still have a slight jiggle in the very center. Also, allow the bars to cool gradually at room temperature before refrigerating.
Are these bars halal?
Yes! These decadent raspberry brownie cheesecake bars are made with halal ingredients and contain no alcohol, pork products, or non-halal additives. All ingredients are commonly available and meet halal dietary requirements.
Can I use a different-sized pan?
Yes, you can adapt the recipe, but baking times will change. For an 8×8-inch pan (smaller bars), increase baking time by 5-10 minutes. For a larger pan like a 9×9-inch, you may need to decrease baking time slightly. The key is watching for the visual cues I mentioned—the cheesecake layer should jiggle slightly in the center when set.
Approximate Nutritional Information per Bar (makes 12 bars)
- Calories: 385
- Protein: 6g
- Total Fat: 24g
- Saturated Fat: 15g
- Carbohydrates: 38g
- Dietary Fiber: 2g
- Sugars: 32g
- Sodium: 180mg
- Cholesterol: 95mg
Note: Nutritional values are approximate and may vary based on specific brands and ingredients used.
Recipe Card: Decadent Raspberry Brownie Cheesecake Bars You’ll Crave Again and Again
Prep Time: 30 minutes
Cook Time: 50 minutes
Chilling Time: 4+ hours
Total Time: 5+ hours
Servings: 12 bars
Difficulty Level: Intermediate
Ingredients:
Brownie Layer:
- 1 cup (225g) unsalted butter
- 8 oz (225g) semi-sweet or dark chocolate, chopped
- 1 cup (200g) granulated sugar
- 3 large eggs
- 1 teaspoon vanilla extract
- ¾ cup (90g) all-purpose flour
- ¼ cup (25g) unsweetened cocoa powder
- ½ teaspoon baking powder
- ¼ teaspoon salt
Cheesecake Layer:
- 16 oz (450g) cream cheese, softened
- ½ cup (100g) granulated sugar
- 2 large eggs
- 1 teaspoon vanilla extract
- ¼ cup (60ml) heavy cream or sour cream
Raspberry Topping:
- 1½ cups (190g) fresh raspberries
- 2 tablespoons granulated sugar
- 1 tablespoon lemon juice
- 1 tablespoon cornstarch
Instructions:
- Preheat oven to 350°F (175°C). Line a 9×13-inch baking pan with parchment paper, leaving overhang on sides.
- Melt butter and chopped chocolate together in a microwave-safe bowl in 30-second intervals, stirring between each.
- In a large bowl, whisk together 1 cup sugar and 3 eggs until pale and fluffy (about 2-3 minutes).
- Fold melted chocolate mixture into eggs and sugar. Stir in 1 teaspoon vanilla extract.
- Whisk together flour, cocoa powder, baking powder, and salt in a separate bowl. Fold into wet ingredients until just combined.
- Pour brownie batter into prepared pan and spread evenly. Bake for 12-14 minutes until mostly set.
- While brownie layer bakes, beat softened cream cheese until smooth (1-2 minutes).
- Add ½ cup sugar to cream cheese and beat until light and fluffy (2 minutes).
- Add 2 eggs one at a time, beating on low speed after each addition.
- Stir in 1 teaspoon vanilla extract and heavy cream until smooth.
- Pour cheesecake mixture over brownie layer and spread evenly.
- Bake for 15-18 minutes until edges are set but center still jiggles slightly.
- In a small bowl, gently toss raspberries with 2 tablespoons sugar, 1 tablespoon lemon juice, and 1 tablespoon cornstarch.
- Scatter raspberry mixture evenly over cheesecake layer.
- Return to oven for 8-10 minutes until raspberry juices set slightly.
- Cool completely at room temperature for 2 hours, then refrigerate for 4+ hours (overnight is best).
- Cut with a hot, damp knife for clean edges. Dust with powdered sugar if desired.
Notes:
- Room temperature ingredients create smoother layers
- Don’t skip the chilling time—it helps bars set properly
- Frozen raspberries work beautifully too; don’t thaw them
- These bars freeze well for up to 3 months
- Store covered in the refrigerator for up to 5 days
Final Thoughts: Share Your Decadent Raspberry Brownie Cheesecake Bar Experience
These decadent raspberry brownie cheesecake bars truly are something special—a dessert that feels fancy enough to serve at a formal dinner yet easy enough to make on a casual weekend. The combination of rich chocolate, creamy cheesecake, and tart raspberries creates a flavor experience that keeps people coming back for more.
I absolutely love making these bars for celebrations, weekend treats, or whenever I want to bring a smile to someone’s face. There’s something magical about that moment when someone takes their first bite and their eyes light up with pure joy.
If you’ve tried this recipe, I’d absolutely love to hear about it! Drop a comment below and tell me your thoughts. Did you make any variations? Did you serve them at a special occasion? Did your family request seconds (or thirds)? Your cooking stories and tips inspire me and help other readers feel more confident in the kitchen.
Share this recipe with your friends and family—whether you’re a seasoned baker or just starting your dessert-making journey, these bars are sure to impress. Happy baking! 🍫🍓
