Remember that feeling as a child when you discovered your favorite cake could become something even more exciting? There’s pure magic in watching someone’s face light up when they bite into a cake popsicle for the first time. The familiar comfort of moist cake meets the refreshing coolness of a frozen treat, creating a dessert that bridges generations and seasons. Whether you’re a busy parent looking for a fun weekend project with the kids or someone who loves transforming ordinary desserts into extraordinary experiences, this cake popsicles recipe will become your new favorite way to reimagine leftover cake.
Table of Contents
What Are Cake Popsicles ? Understanding This Delightful Treat
Cake popsicles represent the perfect fusion between traditional frozen treats and beloved baked goods. Unlike regular ice pops made from fruit juices or flavored water, these frozen delights start with actual cake as their foundation. You’re essentially taking pieces of moist cake, binding them together, inserting a stick, then freezing the creation into a handheld dessert.
The beauty of this concept lies in its versatility. Your leftover birthday cake, that extra slice from last night’s dinner, or even store-bought cake can transform into something completely new. Social media platforms have embraced this trend, with home bakers sharing creative variations that showcase endless possibilities for flavor combinations and decorative finishes.
What sets cake popsicles apart from cake pops is the texture and eating experience. While cake pops involve crumbling cake and mixing it with frosting before coating, cake popsicles maintain more of the original cake’s structure, creating a unique frozen dessert that melts pleasantly in your mouth.
Essential Ingredients for Your Cake Popsicles Recipe

Success with any cake popsicles recipe depends heavily on selecting the right components. Your ingredient choices will determine both the final texture and flavor profile of your frozen treats.
Basic Cake Popsicle Components
| Ingredient Category | Options | Purpose |
|---|---|---|
| Base Cake | Vanilla, chocolate, strawberry, funfetti | Foundation of the popsicle |
| Binding Liquid | Heavy cream, milk, condensed milk | Helps cake hold together when frozen |
| Coating | Melted chocolate, white chocolate, candy melts | Outer shell and flavor enhancement |
| Toppings | Sprinkles, crushed cookies, nuts, coconut | Decoration and texture |
Pro Tips for Ingredient Selection
When choosing your base cake, consider how different types behave when frozen. Dense cakes like pound cake or chocolate fudge cake work exceptionally well because they maintain their structure during the freezing process. Lighter cakes such as angel food cake might require additional binding liquid to prevent crumbling.
The binding liquid serves as the glue that holds everything together. Heavy cream creates the richest texture, while milk offers a lighter option. Condensed milk adds sweetness and helps create a smoother frozen consistency that won’t become rock-hard in your freezer.
Equipment You’ll Need for Perfect Cake Popsicles
Before diving into your cake popsicles recipe, gather these essential tools to ensure smooth preparation:
Essential Tools:
- Popsicle sticks or cake pop sticks
- Mixing bowls in various sizes
- Popsicle molds (optional but recommended for uniform shapes)
- Double boiler or microwave-safe bowl for melting chocolate
- Adequate freezer space
- Measuring cups and spoons for precise ratios
Nice-to-Have Equipment:
- Stand mixer for achieving smoother texture when combining ingredients
- Silicone molds for creating perfectly uniform shapes
- Dipping fork specifically designed for coating treats
Having the right equipment makes the difference between frustrating attempts and enjoyable creation sessions. Professional-looking results become much more achievable when you’re properly prepared.
Step-by-Step Cake Popsicles Recipe
Preparation Phase (15 minutes)
Start by clearing adequate space in your freezer and gathering all necessary tools. Whether you’re using fresh-baked cake or store-bought varieties, both work equally well for this recipe. Break your chosen cake into small, uniform pieces using your hands or a fork. The pieces should be roughly pea-sized for optimal texture.
Assembly Process (20 minutes)
Begin mixing your crumbled cake with binding liquid, starting conservatively with just 2-3 tablespoons. The mixture should hold together when pressed but shouldn’t feel soggy or overly wet. If the mixture seems too dry, add liquid gradually until you achieve the right consistency.
Shape your mixture into ovals or rectangles, keeping them slightly smaller than traditional popsicles since the coating will add bulk. Insert your sticks firmly, ensuring they’re centered and pushed deep enough to provide stability. Place shaped popsicles on a parchment-lined tray and freeze for 30 minutes to set their shape.
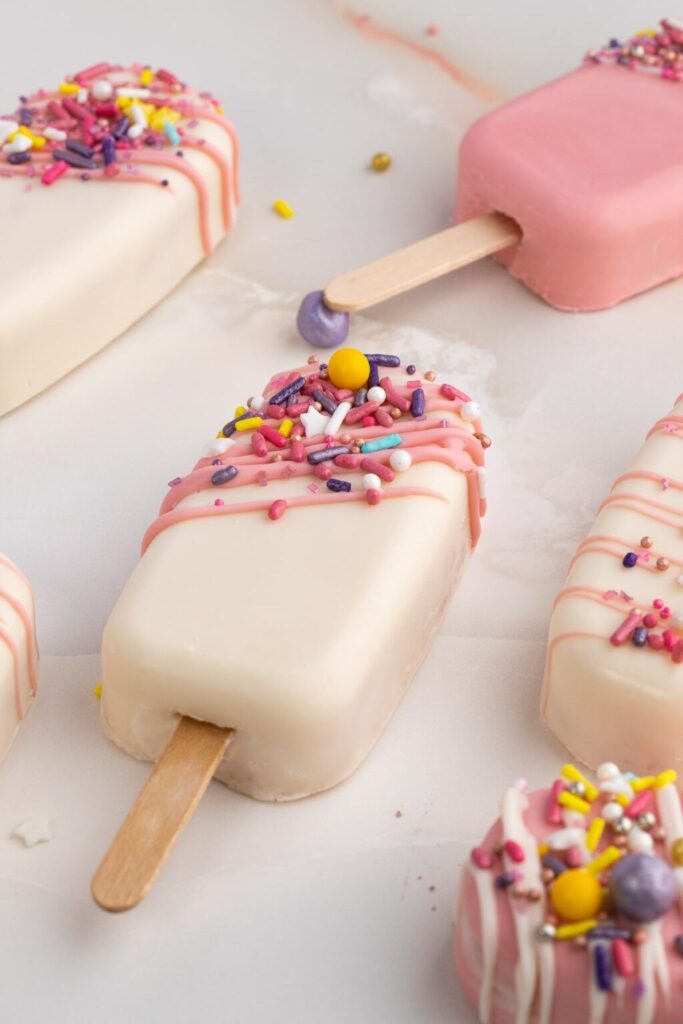
Coating and Finishing (15 minutes active, 2+ hours freezing)
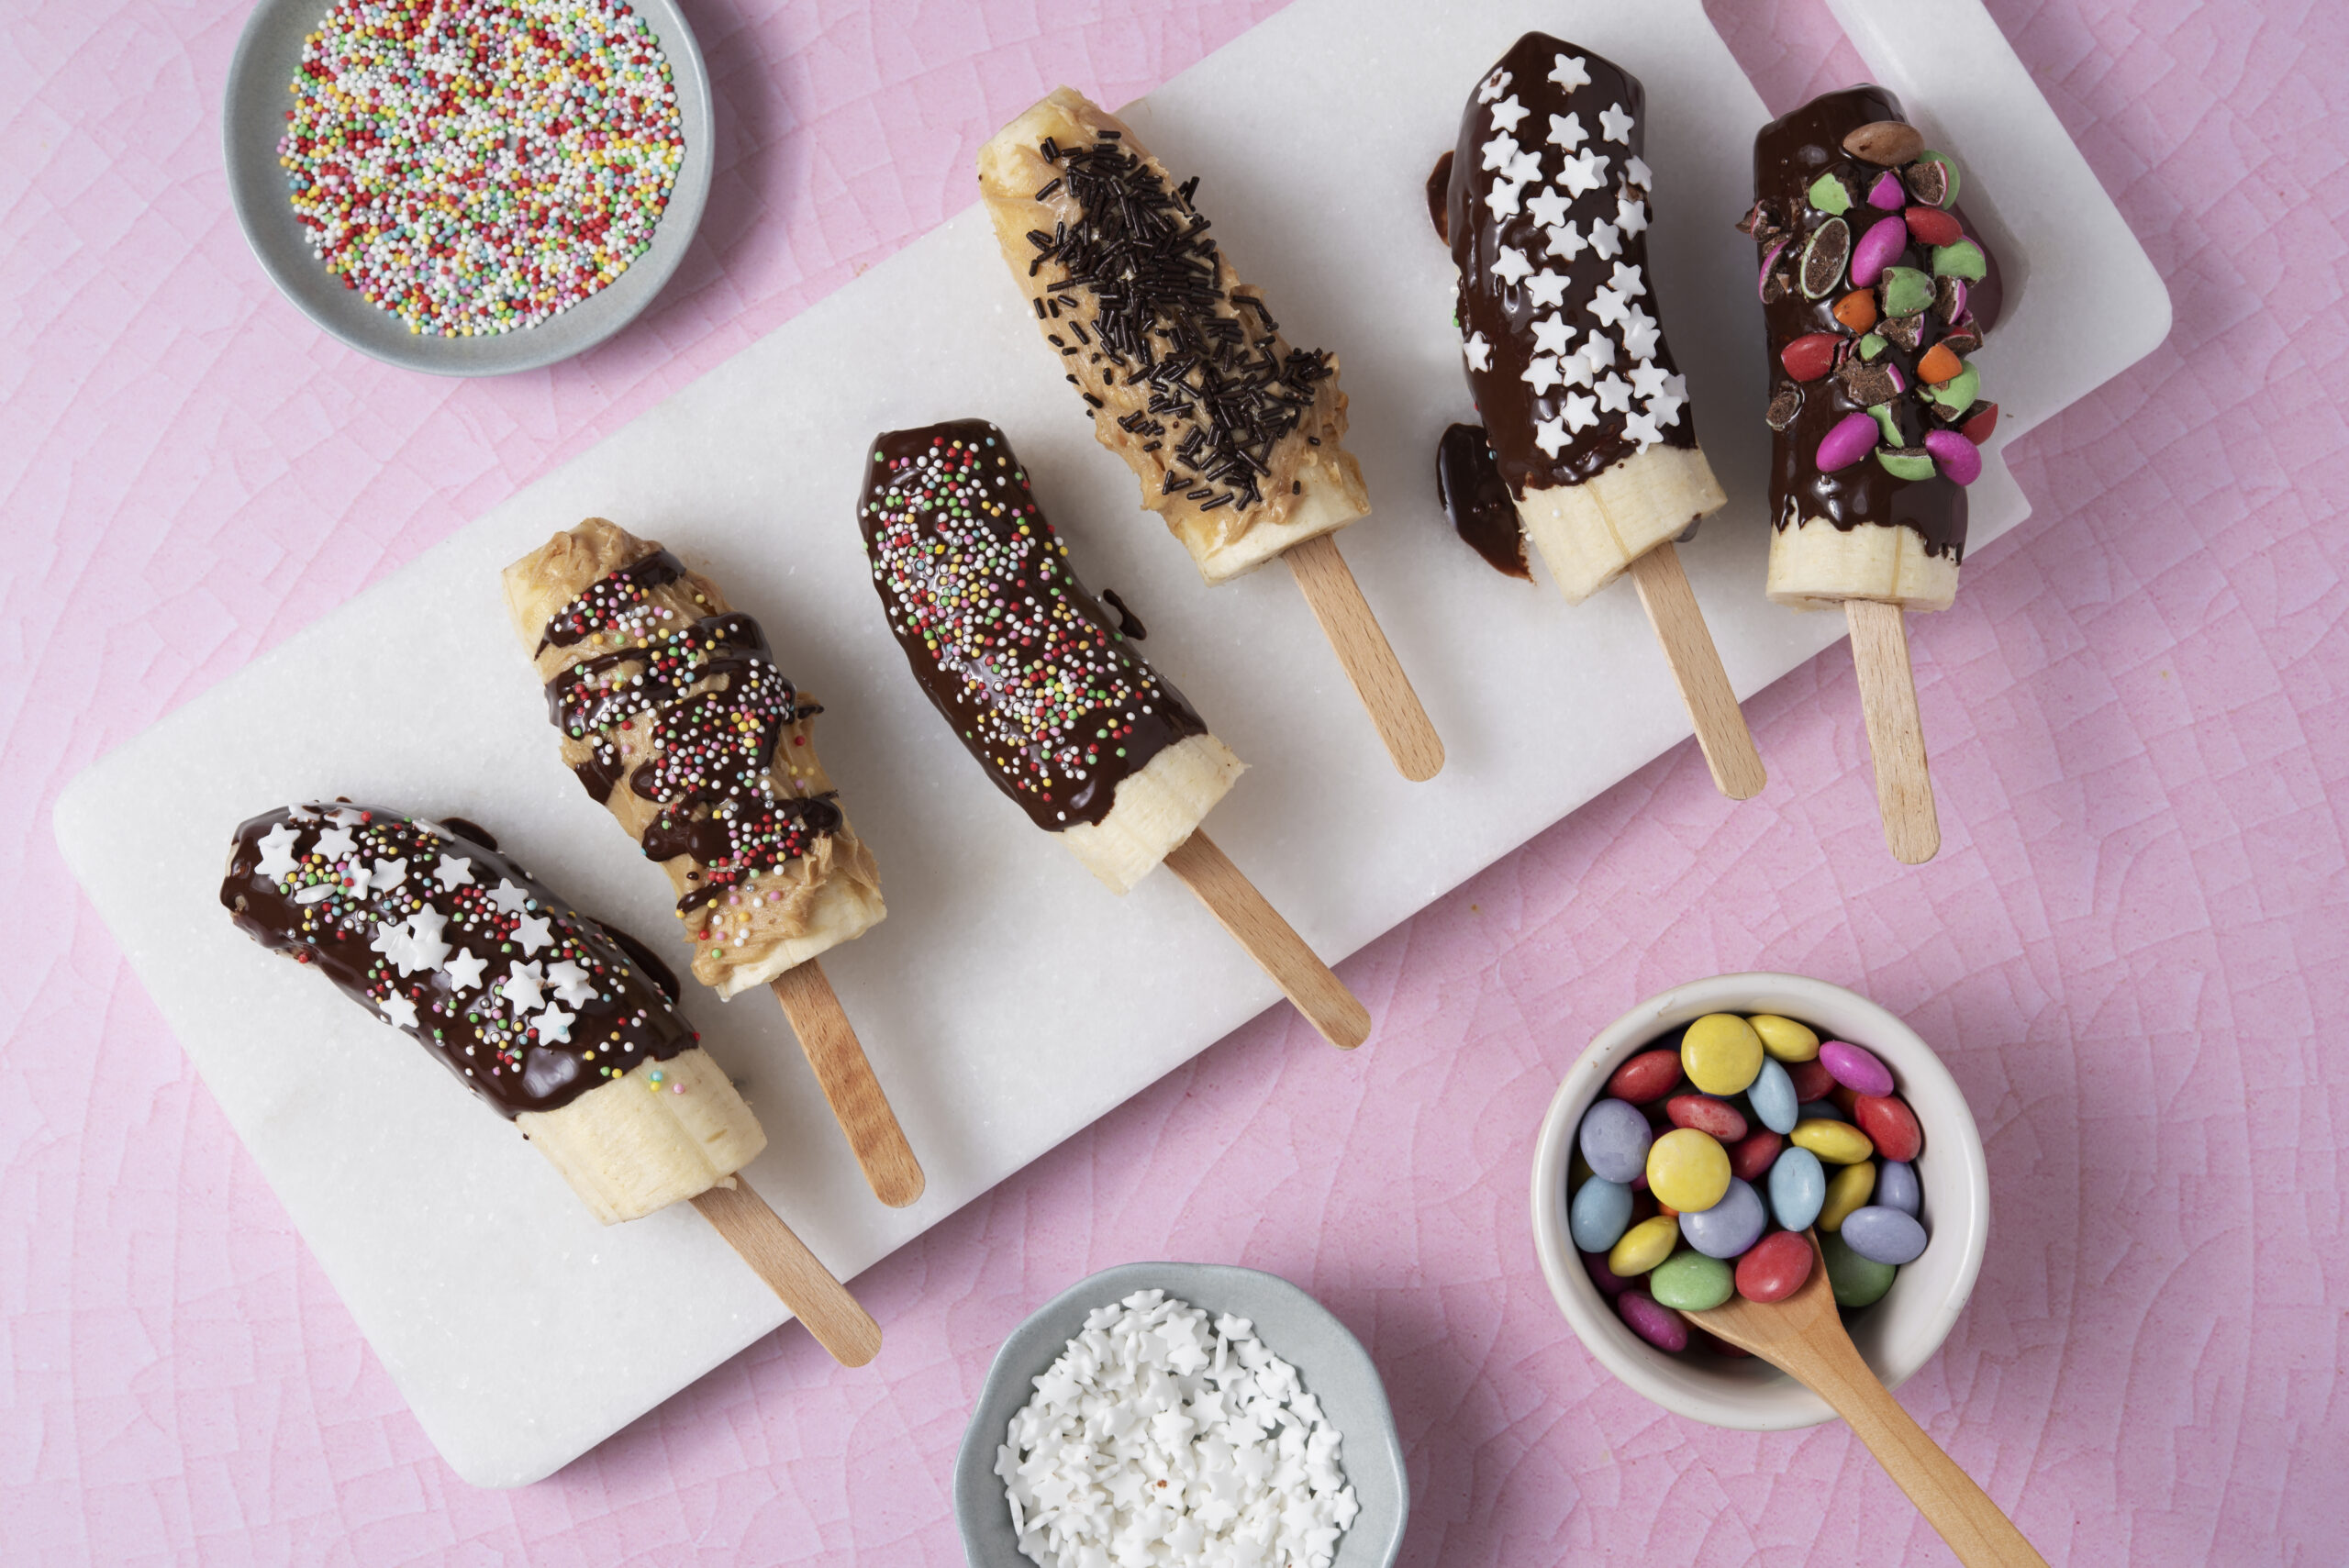
Prepare your coating by melting chocolate using the double boiler method for best control. The chocolate should be smooth and warm to touch, not hot, which could cause temperature shock and cracking.
Remove popsicles from freezer and work quickly but smoothly, dipping each one completely in the melted coating. Allow excess to drip off before immediately adding any desired toppings. The coating will begin setting within seconds, so have all decorative elements ready beforehand.
Return coated popsicles to the freezer for a minimum of 2 hours before serving, though overnight freezing produces the best texture.
Creative Variations for Your Cake Popsicles Recipe
Flavor Combinations That Work
Experimentation leads to the most exciting discoveries with cake popsicles. Consider these proven combinations:
- Classic Chocolate Cake paired with vanilla coating and rainbow sprinkles creates nostalgic appeal
- Funfetti Cake combined with white chocolate and crushed chocolate cookies adds textural interest
- Strawberry Cake matched with dark chocolate and freeze-dried strawberries provides elegant contrast
- Vanilla Cake enhanced with caramel coating and sea salt flakes offers sophisticated flavors
Seasonal Adaptations
Adapt your cake popsicles recipe to match seasonal preferences and available ingredients. Summer calls for lighter flavors incorporating fresh fruit pieces, while fall invites spiced cakes with cinnamon-infused coatings. Winter presentations benefit from rich chocolate variations, and spring celebrations welcome floral flavors with pastel decorations.
Troubleshooting Common Cake Popsicle Problems
Texture Issues
When your mixture becomes too crumbly, gradually add more binding liquid rather than dumping it all at once. Conversely, overly wet mixtures benefit from additional cake crumbs or extended chilling time before shaping.
Coating that cracks usually results from temperature shock. Allow frozen popsicles to sit at room temperature for 2-3 minutes before dipping them in melted coating.
Assembly Problems
Sticks falling out indicate insufficient initial freezing time. Ensure your shaped popsicles spend adequate time in the freezer before coating. Uneven coating typically stems from inconsistent chocolate temperature, so maintain steady heat throughout the dipping process.
Storage and Serving Tips for Cake Popsicles

Proper Storage Methods
Individually wrap finished popsicles in plastic wrap to prevent freezer burn and flavor transfer. Store wrapped popsicles in airtight containers, clearly labeled with preparation dates and flavor descriptions. Properly stored cake popsicles maintain quality for up to three months.
Serving Suggestions
Allow popsicles to sit at room temperature for 2-3 minutes before eating to achieve optimal texture. This brief warming prevents the frozen treat from being uncomfortably hard while maintaining its refreshing qualities. For outdoor events, serve on chilled plates to slow melting, and consider pairing with complementary beverages.
FAQ About Cake Popsicles Recipe
Can I use any type of cake for this cake popsicles recipe?
Most cake varieties work wonderfully, though denser cakes like pound cake maintain better structural integrity than extremely light, airy varieties. Avoid cakes containing large fruit pieces that might interfere with stick placement or create uneven textures.
How long do cake popsicles need to freeze?
Initial shaping requires 30 minutes of freezing time, but final freezing after coating needs at least 2 hours for optimal texture development. For absolute best results, plan for overnight freezing before serving your cake popsicles recipe creations.
What’s the best method for melting chocolate coating?
Double boiler technique provides the most control over temperature, preventing overheating that causes seized chocolate. Alternatively, microwave in 30-second intervals, stirring thoroughly between each heating period until smooth.
Can I prepare cake popsicles ahead of time?
Absolutely! These treats excel as make-ahead desserts. Your cake popsicles recipe results maintain excellent quality for up to three months when properly stored in freezer-safe containers.
Creating perfect cake popsicles transforms ordinary moments into sweet memories while providing endless opportunities for creative expression. Start with basic techniques, then let imagination guide your flavor combinations and decorative choices. Soon, you’ll discover yourself planning cake purchases specifically for your next frozen creation session, building a freezer collection of delightful surprises for family and friends.
Ready to create your own frozen masterpieces? Gather your ingredients, clear some freezer space, and start experimenting with this versatile cake popsicles recipe today. Share your creative variations in the comments below – we’d love to see how you make this recipe uniquely yours!
